
Don & Joe's Auto Service Inc

Car Running Lean Symptoms: Rough Idle, Hesitation, and Backfiring

Car Running Lean Symptoms: Rough Idle, Hesitation, and Backfiring

Car Running Lean Symptoms: Rough Idle, Hesitation, and Backfiring If your car has been acting strange lately – rough idling, poor fuel economy, or a check engine light glaring at you – there’s a chance your engine is running lean. It sounds technical, but the concept is straightforward once you break it down. What Does “Running Lean” Actually Mean? Your engine relies on a precise air-fuel ratio to run properly. The ideal stoichiometric ratio for gasoline engines is about 14.7 parts air to 1 part fuel. When the mixture tips too far toward air and not enough fuel enters the combustion chamber, the engine is said to be running lean. Think of it like baking – too little butter in a recipe throws everything off. Too little fuel in the mixture means incomplete combustion, and that causes a chain of problems throughout the engine. Common Car Running Lean Symptoms Catching these warning signs early can save you from a much bigger repair down the road. Rough or Unstable Idle – When the air-fuel mixture is off, the engine struggles to maintain a smooth idle. You might notice the RPMs fluctuating or the car shaking slightly while stopped. Engine Knocking or Hesitation – Engine knocking is one of the more serious symptoms. A lean mixture burns hotter due to excess oxygen, which can cause pre-ignition or pinging sounds – especially under acceleration. Over time, this heat stress can damage pistons and other internal components. Poor Fuel Efficiency – It might seem counterintuitive, but running lean can actually hurt your fuel efficiency. The engine compensates by working harder, which often means burning more gas overall. Check Engine Light – Your vehicle’s onboard computer monitors the oxygen sensor and other sensors constantly. When the air-fuel ratio falls out of range, it triggers a diagnostic code and lights up that dashboard warning. Backfiring or Overheating – Excess oxygen in the exhaust system can cause unburned fuel to ignite in the exhaust, leading to backfiring. The higher adiabatic flame temperature of a lean mixture also stresses the catalytic converter over time. What Causes an Engine to Run Lean? Several components can be responsible when the fuel mixture goes wrong. Vacuum Leaks – A crack or loose connection in the inlet manifold or vacuum lines lets unmetered air sneak into the system. This extra oxygen throws off the ratio without the fuel delivery adjusting to compensate. Faulty Oxygen Sensor or Mass Flow Sensor – The oxygen sensor tells the engine control unit how much oxygen is in the exhaust. The mass flow sensor (MAF sensor) measures incoming air. If either one sends bad data, the fuel injection system miscalculates and delivers too little fuel. Clogged Fuel Injectors or Fuel Pump Issues – When injectors are dirty or the fuel pump is weak, not enough gasoline reaches the combustion chamber. Carbon buildup is a common culprit, especially in high-mileage engines. Dirty or Restricted Air Filter – Interestingly, a heavily clogged air filter can sometimes contribute to lean conditions by disrupting airflow readings, even though most people associate it with a rich mixture. Carburetor Problems – On older vehicles equipped with a carburetor rather than modern fuel injection, a misadjusted or worn carburetor can easily deliver the wrong mixture ratio. How to Fix a Lean Running Engine The fix depends entirely on what is causing the lean condition. A proper computer diagnostics scan is the best starting point – it reads the fault codes and points technicians toward the specific sensor, leak, or component that is failing. Common repairs include replacing the oxygen sensor, cleaning or replacing fuel injectors, patching vacuum leaks, or servicing the fuel system. In more serious cases, the catalytic converter or internal engine components may need attention if the lean condition went on too long. Attempting to guess your way through the repair without a diagnostic scan often leads to unnecessary part replacements and wasted money. How to Fix Car Running Lean Symptoms A lean-running engine is not something to ignore. Left unchecked, it can cause real damage to spark plugs, pistons, and even your catalytic converter. The good news is that with the right diagnostic tools and experienced technicians, the root cause can be found and fixed efficiently. If your vehicle is showing any of these symptoms, schedule an engine repair service with Don & Joe’s Auto Service in New Castle, IN by calling 765-529-3555. Getting it checked early is always the smarter and cheaper choice.

Car Running Lean Symptoms: Rough Idle, Hesitation, and Backfiring Read More »

What Is a Diagnostic Test on a Car? Here's What It Checks

What Is a Diagnostic Test on a Car? Here’s What It Checks

What Is a Diagnostic Test on a Car? Here’s What It Checks If your check engine light just came on and you have no idea why, you are not alone. That little glowing icon on your dashboard sends millions of drivers into a mild panic every year. A diagnostic test is the first step toward getting a real answer, and understanding what it actually does can save you time, money, and a lot of guesswork. Think of It Like a Physical Examination for Your Car A diagnostic test on a car works a lot like a physical examination at a doctor’s office. Instead of a physician checking your reflexes and blood pressure, a technician connects a scan tool to your vehicle’s computer system to read what is going on underneath the hood. Modern vehicles are equipped with on-board diagnostics, often referred to as OBD-II, a standardized system built into cars, trucks, and SUVs that continuously monitors performance data across dozens of systems. When something falls outside of the normal range, the computer logs a fault code and often triggers a warning light on your dashboard. The scan tool acts almost like an image scanner for your car’s internal systems. It pulls those stored fault codes and gives the mechanic a starting point for diagnosis, much like how a medical device gives a doctor data before making a medical diagnosis. What Does a Diagnostic Test Actually Check? This is where a lot of drivers get surprised. A car diagnostic test does not just look at one thing. It checks multiple systems at once, giving the auto mechanic a full picture of how your vehicle is performing. Engine Performance The engine is typically the first area examined. The scan tool checks for misfires, fuel delivery problems, and issues with the ignition system. Sensors throughout the engine report back to the computer, and any irregular readings get flagged for further inspection. Transmission Transmission problems can be subtle at first, but the diagnostic software catches abnormal shifting patterns, slipping, and pressure irregularities before they turn into expensive repairs. Catching a transmission issue early through a diagnostic test is one of the most practical ways to avoid a much larger bill later. Brakes and Safety Systems Brake sensors, anti-lock brake system performance, and even airbag systems all fall within the scope of a full diagnostic. The airbag system in particular is rarely top of mind until it needs to work, so having it checked during routine maintenance is smart practice. Heating, Ventilation, and Air Conditioning (HVAC) Your heating and cooling system has its own set of sensors and controls. A diagnostic test can reveal whether your HVAC system is underperforming due to a faulty sensor, a refrigerant issue, or a problem with the blower components. Exhaust System Oxygen sensors, catalytic converter efficiency, and exhaust system readings all get reviewed. A failing oxygen sensor is one of the most common reasons the check engine light turns on, and it directly affects fuel economy and emissions output. How Is a Car Diagnostic Test Different From a Visual Inspection? A visual inspection is exactly what it sounds like – a mechanic looks at what can be seen with the naked eye. A diagnostic test goes several layers deeper. It accesses live data streams from sensors that are buried inside components you would never see during a standard walk-around. Think of a visual inspection as looking at someone and guessing how they feel, while a diagnostic test is more like running bloodwork. Both have value, but the data from a diagnostic gives a technician far more accurate information to work with. Does Every Shop Do the Same Diagnostic? Not exactly. Large chain operations like Jiffy Lube or Meineke Car Care Centers may offer basic code reading as part of a service package, but reading a fault code is only the beginning. Interpreting what that code means and tracing it back to the actual root cause requires experienced technicians and proper diagnostic software. A fault code tells you that something is wrong, similar to how a medical test flags an abnormality. It does not automatically tell you why. That is where the skill of a qualified auto mechanic becomes essential. Some vehicles, like a Volvo, require brand-specific software and more advanced tools for accurate readings. A general code reader simply will not give you the full picture on every car. When Should You Get a Diagnostic Test? You do not have to wait for a warning light to get a diagnostic test. Many drivers include it as part of their routine maintenance schedule, especially before buying a used vehicle or heading into a new season. If your vehicle is hesitating, stalling, running rough, getting worse fuel mileage, or showing any unusual behavior, a diagnostic test is the right first move. What to Do Next If Your Car Needs a Diagnostic Test A car diagnostic test is one of the smartest investments you can make in your vehicle’s long-term health. It takes the guesswork out of repairs and gives both you and your technician clear, reliable data to work from. If your check engine light is on or something just does not feel right with your vehicle, do not wait. Contact Don and Joe’s Auto Service in New Castle, IN at 765-529-3555 to schedule your computer diagnostic and get accurate answers fast.

What Is a Diagnostic Test on a Car? Here’s What It Checks Read More »

Solid Check Engine Light Vs Flashing: What Each Warning Really Means

Solid Check Engine Light Vs Flashing: What Each Warning Really Means

Solid Check Engine Light Vs Flashing: What Each Warning Really Means That little light on your dashboard can send a wave of anxiety through any driver. But here is the thing – not all check engine lights are created equal. Whether it is glowing steadily or blinking at you like an alarm, the signal your car is sending means something very different in each case. Understanding the difference could save you from a costly repair down the road or protect your engine from serious damage right now. What the Solid Check Engine Light Is Telling You When the check engine light stays on without flickering, your vehicle’s on-board diagnostics system has detected a problem – but not necessarily an emergency. The computer has logged a fault code that an auto mechanic can read with a diagnostic scanner. Common reasons for a steady light include a failing oxygen sensor, spark plugs, a loose gas cap affecting the air-fuel ratio, a worn spark plug, or an issue with the exhaust system. A failing catalytic converter is another frequent culprit that triggers a solid light, often alongside reduced fuel efficiency. Should You Keep Driving? A steady light usually means you have some time to schedule a proper inspection rather than pull over immediately. That said, ignoring it is never a smart move. Small problems – like a misfiring cylinder or a weak ignition coil – can quietly grow into much bigger ones if left unaddressed. What a Flashing Check Engine Light Really Means A flashing check engine light is a different story entirely. This is your car telling you something is seriously wrong, right now. In most cases, a blinking light points to an active engine misfire. When a cylinder misfires repeatedly, unburned fuel enters the exhaust system. That raw fuel can overheat and destroy your catalytic converter in a short amount of time. You might also notice engine knocking, rough idling, or a sudden drop in power. What You Should Do Immediately If your check engine light is flashing, do not push your luck. Reduce your speed, avoid heavy acceleration, and get to a trusted auto mechanic as soon as possible. Continuing to drive under these conditions risks serious damage to your ignition system, exhaust components, and engine internals. Here is a quick comparison to keep in mind: Solid light – A detected fault that needs attention soon, but is not always an immediate emergency Flashing light – An active, serious problem that requires prompt action to prevent major damage How Technicians Diagnose the Problem Whether your light is solid or flashing, the diagnostic process starts with reading the fault codes stored in your vehicle’s computer. From there, a skilled technician will inspect the relevant components – whether that is the ignition coil, spark plugs, oxygen sensor, fuel delivery system, or something deeper inside the engine. At Don and Joe’s Auto Service in New Castle, IN, ASE-certified technicians use state-of-the-art diagnostic technology to pinpoint the issue accurately. There is no guesswork, just honest answers and reliable repairs backed by a 1-year warranty on most parts and labor. Common Issues Behind Both Types of Warnings Understanding what tends to trigger each warning can help you have a more informed conversation with your mechanic. For a steady light, common causes include: Faulty oxygen sensor affecting fuel efficiency and emissions Worn spark plugs cause incomplete combustion A damaged or aging catalytic converter A loose or cracked fuel cap disrupts fuel vapor pressure Issues with the electric battery or charging system For a flashing light, the usual suspects are: Severe engine misfires from a bad ignition coil or spark plug Fuel delivery problems are causing an incorrect air-fuel ratio Exhaust gas buildup from a clogged catalytic converter Internal engine issues affecting one or more cylinders Why Acting Quickly Always Pays Off Delaying a check engine light diagnosis – whether solid or flashing – almost always results in higher repair costs. A sensor issue caught early is a fraction of the cost of a damaged catalytic converter or a rebuilt engine. Your car is communicating with you through that dashboard warning, and it is worth listening to. What to Do Next When Your Check Engine Light Comes On A solid check engine light calls for timely attention, while a flashing one demands immediate action. Either way, getting an accurate diagnosis is the smartest move you can make. If your check engine light is on in New Castle, IN, do not wait and wonder. Schedule a computer diagnostics appointment with Don and Joe’s Auto Service and get a clear answer from technicians who have been keeping local drivers safe since 1977. Call 765-529-3555 today.

Solid Check Engine Light Vs Flashing: What Each Warning Really Means Read More »

How To Prevent Oil Leaks Before They Start

How To Prevent Oil Leaks Before They Start

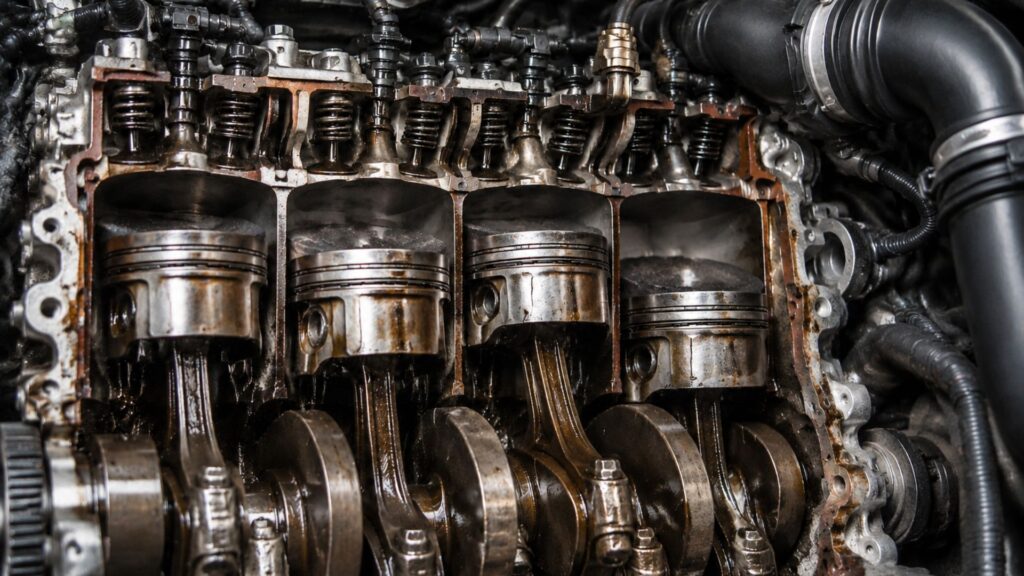
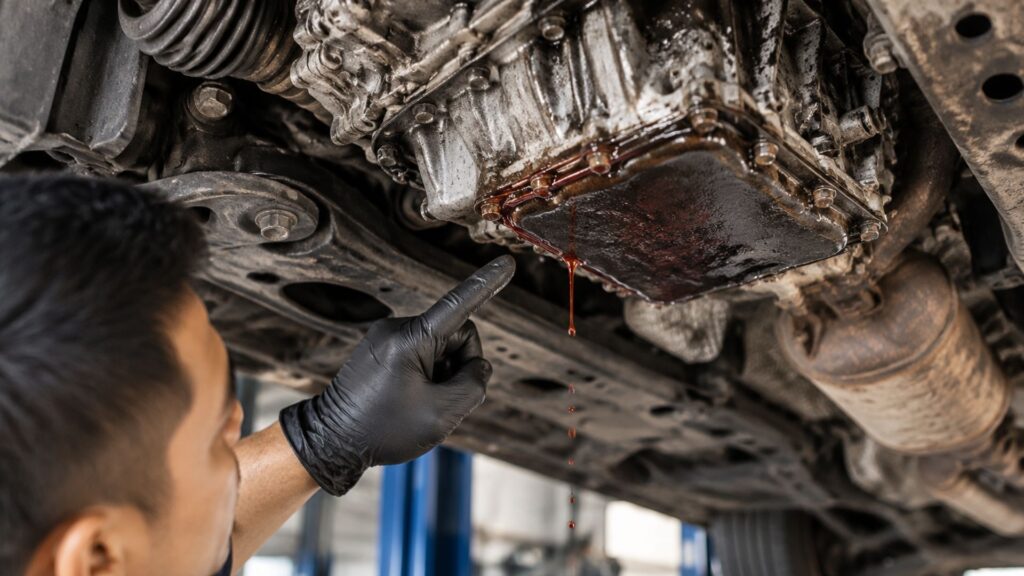
How To Prevent Oil Leaks Before They Start Oil leaks have a way of sneaking up on you. One day your driveway is clean, and the next there is a dark, greasy stain where your car usually sits. The good news is that most oil leaks do not happen overnight. They build up over time, and with the right habits, you can stop them before they ever become a real problem. Why Oil Leaks Happen in the First Place Motor oil keeps your engine running smoothly by lubricating moving parts and reducing heat. When something disrupts that system – a worn gasket, a cracked seal, or a failing crankcase ventilation system – oil finds its way out. The most common culprits are aged gaskets made from natural rubber or cork that dry out and lose their seal over time. A wet sump engine, which is the most common type in everyday vehicles, relies heavily on these seals and gaskets to contain oil pressure. When they fail, even a small gap can turn into a messy, expensive leak. Regular Oil Changes Are Your First Line of Defense This sounds simple, but it is one of the most powerful things you can do. Old, degraded motor oil loses its viscosity and becomes acidic over time. That degraded oil eats away at seals and gaskets far faster than fresh oil would. Using a quality oil – whether conventional or a high-performance option like Driven Racing Oil – matters just as much as how often you change it. Always follow your vehicle manufacturer’s recommended oil change intervals and use the correct oil grade for your engine. How To Prevent Oil Leaks: Key Maintenance Habits Check Your Oil Level Regularly Do not wait for a warning light. Pop the hood every few weeks and check the dipstick. If your oil level is consistently dropping without any visible leak, that is a warning sign worth investigating. Low oil levels put extra strain on your engine components, speeding up wear on valve covers, gaskets, and seals. Catching a drop in oil early gives you time to act before a small issue becomes a large repair bill. Inspect Gaskets and Seals During Every Service Visit Gaskets around the valve cover, oil pan, and engine block are common failure points. When your car goes in for routine maintenance, ask your technician to take a look at these areas for early signs of seepage or cracking. At Don and Joe’s Auto Service in New Castle, IN, the ASE-certified technicians make it a point to flag these issues early. Catching a gasket that is just starting to weep oil is far cheaper than dealing with a full-blown leak that has soaked surrounding components. Do Not Ignore the Crankcase Ventilation System The crankcase ventilation system – often called the PCV system – regulates pressure inside your engine. When this system gets clogged or fails, pressure builds up inside the crankcase and forces oil out through gaskets and seals. A simple PCV valve check during routine maintenance can prevent that pressure buildup. It is a small part with a big job, and it is easy to overlook. Watch for These Early Warning Signs Being proactive means knowing what to look for before a leak becomes obvious. Small oil spots or stains beneath your parked vehicle A burning oil smell is coming from under the hood A slightly low oil reading on the dipstick without explanation Visible wet or greasy residue around engine gaskets or the valve cover If you notice any of these, do not wait. Even a slow seep can escalate if ignored. Does Car Insurance Cover Oil Leaks? This is a common question, and the short answer is usually no. Standard auto insurance policies do not cover mechanical failures or wear-related issues like oil leaks. Insurance typically covers damage from accidents or specific events, not gradual engine wear. This is exactly why preventive maintenance matters – what insurance will not cover, routine care can prevent. Keep Oil Leaks From Starting Some vehicles, including the MINI Cooper, are known to develop oil leaks around the valve cover gasket as they age. If you drive a MINI or any European vehicle, staying on top of gasket inspections is especially important given how tightly these engines are designed. Conclusion Preventing oil leaks comes down to consistent, proactive care. Change your oil on schedule, keep an eye on your fluid levels, and make sure someone is checking those gaskets and seals before they fail. If your car is already showing signs of a potential leak, do not let it sit. Reach out to the team at Don and Joe’s Auto Service and schedule a preventive maintenance visit. A small investment in prevention today saves a much larger repair tomorrow. Call 765-529-3555 to get started.

How To Prevent Oil Leaks Before They Start Read More »

Valve Cover Gasket Oil Leak: Signs, Causes, and Quick Fixes

Valve Cover Gasket Oil Leak: Signs, Causes, and Quick Fixes

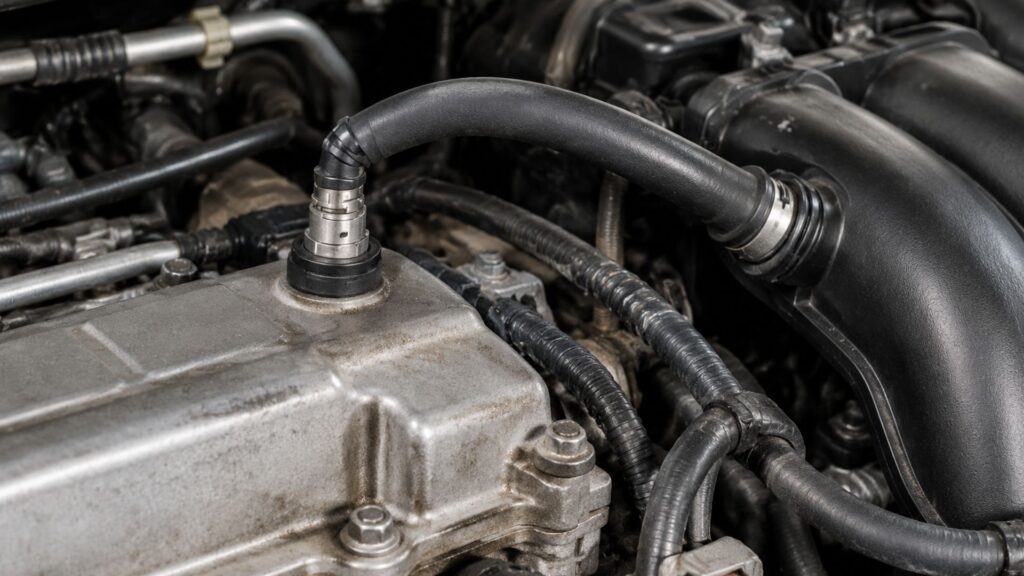
Valve Cover Gasket Oil Leak: Signs, Causes, and Quick Fixes If you’ve ever noticed a faint burning smell after a drive or spotted a dark puddle under your car, there’s a good chance your valve cover gasket is trying to tell you something. It’s one of those parts most drivers never think about – until it becomes a problem. The good news? Once you know what to look for, catching a failing valve cover gasket early can save you from a much bigger repair bill down the road. What Is a Valve Cover Gasket and What Does It Do? The valve cover, sometimes called a rocker cover, sits on top of the engine and shields the camshaft, rocker arms, and other components inside the cylinder head. The gasket seals the connection between the rocker cover and the engine block, keeping motor oil where it belongs – inside the engine. Without a good seal, oil leaks out and can drip onto hot surfaces like the exhaust manifold or exhaust system, creating smoke, odors, and potential fire hazards. It’s a small part doing a very important job. Common Signs of a Failing Valve Cover Gasket You Smell Something Burning When motor oil drips onto the exhaust manifold or other hot engine parts, it burns off and creates a distinct smell. If you notice this after parking or during a drive, do not ignore it. Oil Spots Under Your Car A leaking rocker cover gasket often leaves oily residue on the ground where you park. This is motor oil slowly working its way out of a compromised seal and pooling beneath the vehicle. Low Oil Levels Between Changes If you’re topping off your oil more frequently than usual, a slow valve cover gasket leak could be the culprit. A wet sump system depends on consistent oil levels to protect every moving part in the engine. Visible Oil Around the Valve Cover Pop the hood and look at the top of the engine. If you see oily buildup or residue around the valve cover or near the spark plug wells, that’s a clear indicator that the gasket is no longer sealing properly. Oil leaking into the spark plug area can also cause misfires and rough idling. Engine Warning Light While not exclusive to this issue, a dashboard warning light combined with any of the symptoms above warrants a closer look. What Causes a Valve Cover Gasket to Fail? Age and Heat Cycles Most gaskets are made from materials like natural rubber, cork, or silicone composites. Over time, repeated heating and cooling cycles cause these materials to shrink, crack, and harden. Aluminium valve covers are especially prone to warping, which breaks the seal even faster. Over-Tightening or Under-Tightening Using the wrong torque when installing the valve cover is a surprisingly common mistake. Too much force from a torque wrench can crush the gasket or crack an aluminium cover. Too little, and the seal never fully seats. Every valve cover has a manufacturer-specified torque value for the screws – skipping this step causes premature failure. Sludge and Pressure Buildup When oil isn’t changed regularly, it thickens into sludge. This buildup increases internal engine pressure, which pushes against the gasket from the inside and accelerates wear. Keeping up with oil changes is one of the simplest ways to extend the life of your gaskets. Poor Installation or Cheap Materials Sometimes a gasket fails simply because the previous replacement used a low-quality part or skipped proper surface preparation. The mating surfaces on both the cylinder head and rocker cover need to be clean and flat before a new gasket is installed. Can You Fix a Valve Cover Gasket Leak Yourself? Temporary Measures Some drivers use RTV silicone or a sealant as a stopgap for minor seepage. Cleaning the area with brake cleaner and applying a thin bead of RTV silicone around the affected spot can slow a leak temporarily. This is not a permanent fix – it buys time but doesn’t address the underlying problem. Proper Replacement A full gasket replacement is the right solution. The process involves removing the valve cover, cleaning both mating surfaces thoroughly, and installing a new gasket – sometimes paired with fresh RTV silicone at corners or on V8 engine configurations with complex cover shapes. The cover is then torqued back down using a torque wrench to spec. If the cover itself is warped, especially on aluminium designs, it may need resurfacing or replacement before a new gasket will seal correctly. When to Call a Professional If the leak is near the exhaust system, if oil is reaching the brake components, or if you’re dealing with a larger engine layout like a V8, it’s worth having a professional handle the repair. A misdiagnosed leak could actually be coming from the head gasket rather than the rocker cover – and those are two very different repairs in terms of cost and complexity. Stop an Oil Leak In Your Valve Cover Gasket Before It Gets Worse A valve cover gasket leak is not something to push off. Whether you’re smelling burning oil, losing motor oil faster than expected, or seeing visible residue near the cylinder head, acting early keeps repair costs manageable. The team at Don and Joe’s Auto Service in New Castle, IN, has handled engine repairs of every kind since 1977. If your car is showing any of these signs, call us at 765-529-3555 or learn more about our engine repair services to get your vehicle back in shape.

Valve Cover Gasket Oil Leak: Signs, Causes, and Quick Fixes Read More »

How Long Can You Drive With a Leaking Axle Seal Before It Causes Major Damage?

How Long Can You Drive With a Leaking Axle Seal Before It Causes Major Damage?

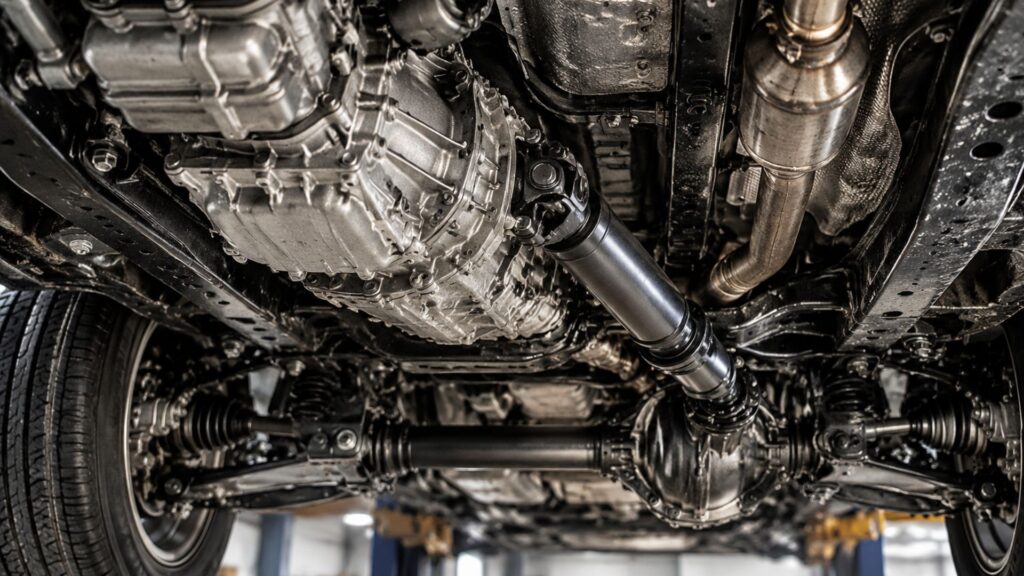
How Long Can You Drive With a Leaking Axle Seal Before It Causes Major Damage? If you have noticed a puddle of oil under your car or truck, a leaking axle seal might be the culprit. It is tempting to put off the repair and keep driving, especially when the vehicle still feels fine. But how long can you actually drive with a leaking axle seal before things get serious? The honest answer is: not very long at all. What Does an Axle Seal Actually Do? An axle seal keeps gear oil or differential fluid contained inside the axle housing or transmission. Without it doing its job, fluid escapes, and critical components lose the lubrication they depend on. On a four-wheel drive vehicle like a Jeep or Toyota 4Runner, this becomes even more important because the drivetrain has more seals, more fluid pathways, and more components at risk. Think of the seal as the barrier between a healthy drivetrain and an expensive repair bill. What Happens When You Ignore a Leaking Axle Seal This is where drivers in New Castle, IN, get into trouble. A slow leak can quickly progress into a serious mechanical failure. Here is how the damage typically unfolds: Stage 1 – Early Leak: A small amount of fluid escapes. The bearing still has some lubrication, and the vehicle may feel normal. You might notice a faint oil smell or a small spot under the car. Stage 2 – Fluid Loss Increases: As the seal deteriorates, more oil leaks out. The axle bearing begins running dry. You may start to hear a grinding or humming noise, or feel a subtle vibration through the wheel. Stage 3 – Bearing Failure: Without lubrication, the bearing overheats and breaks down. At this point, the damage has spread beyond just the seal. You are now looking at bearing replacement, possible axle shaft damage, and, in severe cases, differential damage. Stage 4 – Complete Failure: In the worst cases, a seized or broken axle can cause loss of vehicle control. This is not just a maintenance issue – it becomes a safety issue. How Long Is Too Long? Most experienced technicians, including those referenced by sources like YourMechanic and members of communities like the Four Wheel Drive Association of BC, agree that driving more than a few days with a known axle seal leak is pushing your luck. The exact timeline depends on how fast the fluid is escaping and how much is left in the system. If the leak is minor and you top off the fluid, you might extend that window slightly. But this is a temporary workaround, not a solution. Continuing to drive without fixing the seal risks damage to the axle, the differential, and even the brake components if oil migrates onto the brake pads or rotors. Yes, a leaking axle seal can contaminate your brakes. Gear oil on brake pads destroys stopping power, which turns a $150 seal repair into a much larger job involving both the driveline and brake system. Signs You Should Stop Driving Immediately Pull over and call for help if you notice any of the following: A loud grinding or clunking noise coming from the axle area Strong vibration through the steering wheel or floor The vehicle is pulling to one side under braking A visible pool of oil near a tire or wheel A burning smell near the wheel well These signs suggest the bearing or axle may already be failing. At this stage, continuing to drive risks your safety and the safety of others on the road. What the Repair Actually Involves Fixing a leaking axle seal is a straightforward job for a trained technician. The old seal is removed, the axle and housing are inspected for wear, a new seal is pressed in, and fluid is topped off. If the bearing has been damaged, it will need replacement at the same time. The right tool selection and proper torque specs matter here – a poorly installed seal will just leak again. At Don and Joe’s Auto Service, the team handles driveline repair with the same precision they bring to every other job. If you suspect a leak, getting a proper diagnosis early keeps the repair simple and affordable. Don’t Ignore a Leaking Axle Seal A leaking axle seal is not something to monitor and hope for the best. Fluid loss leads to bearing failure, bearing failure leads to axle damage, and axle damage can compromise your brakes and your safety. The longer you wait, the more expensive the fix becomes. If you are dealing with a suspected leak on your car or truck, reach out to the team at Don and Joe’s Auto Service and schedule a driveline repair inspection before a small seal turns into a major repair.

How Long Can You Drive With a Leaking Axle Seal Before It Causes Major Damage? Read More »

Tire Balancing Vs Alignment: Which One Does Your Car Really Need?

Tire Balancing Vs Alignment: Which One Does Your Car Really Need?

Tire Balancing Vs Alignment: Which One Does Your Car Really Need? Your steering wheel is shaking. Your tires are wearing unevenly. Something feels off, but you are not sure what. Sound familiar? Most drivers assume they need one or the other – tire balancing or wheel alignment – but the truth is, these are two completely different services that solve two completely different problems. Mixing them up is easy, but getting the wrong service means wasting money and leaving the real issue unresolved. Here is a clear, honest breakdown of what each service actually does and how to tell which one your car is asking for. What Is Tire Balancing? Tire balancing is exactly what it sounds like. It corrects uneven weight distribution around a tire and wheel assembly. When a tire is mounted on a wheel, tiny imperfections in both the tire and the rim can cause one side to be slightly heavier than the other. That imbalance might seem small, but at highway speeds, it causes a noticeable vibration – usually felt in the steering wheel, the seat, or the floorboard. A technician uses a balancing machine to spin the wheel and detect where the weight is off, then attaches small counterweights to bring everything into balance. Common Signs You Need Tire Balancing Vibration in the steering wheel or vehicle cabin, especially at speeds above 50 mph Uneven or scalloped tire wear patterns Poor fuel efficiency that has no other explanation The car feels rougher than usual on smooth roads Tire balance issues are often caused by normal wear and tear over time, hitting a pothole, or simply driving thousands of miles. Most manufacturers recommend having your tire balance checked every 5,000 to 6,000 miles or whenever you notice vibration. What Is Wheel Alignment? Wheel alignment is about angles, not weight. It refers to adjusting the direction and angle of your tires so they are perfectly parallel to each other and perpendicular to the road – essentially making sure every wheel is pointing in the right line. A car’s suspension connects the wheels to the vehicle frame, and over time, that suspension can shift. Hitting a curb, driving on rough roads, or general wear and tear can all knock your alignment out of spec. Even a minor misalignment changes how your tires make contact with the road. Common Signs You Need a Wheel Alignment Your car pulls to the left or right even when you are driving straight The steering wheel is off-center when the car is going straight Uneven tire wear – one edge wearing faster than the other The car feels loose or drifts without input from the steering wheel Alignment is measured in three angles: camber, toe, and caster. You do not need to memorize those terms, but a technician will check all three to make sure your tires are sitting and rolling exactly as the manufacturer intended. Tire Balancing Vs Alignment: The Key Differences It helps to see these two services side by side.   Tire Balancing Wheel Alignment   What it fixes Uneven weight distribution Incorrect tire angles Main symptom Vibration Pulling or drifting What wears out Tires unevenly Tires on one edge Involves Counterweights on the wheel Adjusting suspension angles How often Every 5,000-6,000 miles Every 1-2 years or after an impact Both services protect your tires from premature wear, improve fuel economy, and keep your car handling the way it should. But they are not interchangeable. Do You Need Both at the Same Time? Absolutely. In fact, it is common. If you have been driving on misaligned tires for a while, the uneven contact with the road can also throw off your tire balance. Many shops – including the team at Don and Joe’s Auto Service in New Castle, IN – recommend addressing both during the same visit to save time and catch everything at once. Cold inflation pressure also plays a role here. Tires that are consistently under- or over-inflated will wear unevenly regardless of how well they are balanced or aligned. Always check your vehicle care regularly. How a Technician Figures Out Which You Need A good technician does not guess. They start with a visual inspection of the tires, looking at wear patterns. From there, they may use a sensor-equipped balancing machine or a computerized alignment rack to get precise readings. Wear on the center of the tread often points to inflation issues. Wear on both outer edges suggests the tires have been under-inflated. Wear on one edge almost always points to an alignment problem. Cupping or scalloping across the tread is a classic sign of a tire balance issue. Which Service Does Your Car Need? If your car is vibrating, you likely need a tire balance. If it is pulling or your tires are wearing on one edge, a wheel alignment is probably the answer. When in doubt, let a professional take a look before the problem gets worse. The team at Don and Joe’s Auto Service has been diagnosing and fixing exactly these kinds of issues for drivers in New Castle, IN, since 1977. Schedule your suspension and brakes service or call us at 765-529-3555.

Tire Balancing Vs Alignment: Which One Does Your Car Really Need? Read More »

Why Your Spongy Brake Pedal Is a Red Flag - and How to Fix It Fast

Why Your Spongy Brake Pedal Is a Red Flag – and How to Fix It Fast

Why Your Spongy Brake Pedal Is a Red Flag – and How to Fix It Fast There are few things more unsettling than pressing your brake pedal and feeling it sink toward the floor like a wet sponge. If your car’s brakes feel soft, mushy, or unresponsive, that is not a quirk you should ignore. It is a warning sign that something in your braking system needs attention – and fast. What Does a Spongy Brake Pedal Actually Mean? Your vehicle’s braking system relies on pressure. When you press the pedal, brake fluid transfers force from the master cylinder through hoses and lines to the disc brakes or drum brakes at each wheel. That system only works correctly when it is sealed and pressurized. A spongy pedal usually means that pressure is escaping somewhere it should not, or that something is compromising the fluid’s ability to carry that force efficiently. Common Causes of a Soft or Spongy Brake Pedal Air in the Brake Lines This is the most common culprit. Unlike brake fluid, air is compressible. When air enters the brake lines – often after a repair or a leak – the pedal loses its firm feel. Instead of transmitting clean pressure to the caliper piston or wheel cylinder, your foot pushes against a pocket of air that simply compresses rather than doing its job. Low or Contaminated Brake Fluid Brake fluid absorbs moisture over time. When water mixes into the fluid, it lowers the boiling point and can cause the fluid to behave unpredictably under pressure. A low fluid level may also point to a leak somewhere in the system – around a hose, the master cylinder, or even at the caliper itself. A Failing Master Cylinder The master cylinder is the heart of your brake system. It converts the force from your foot into hydraulic pressure. When the internal seals inside the cylinder wear out, fluid bypasses them instead of building pressure, and your pedal goes soft. This is a repair that should not be delayed. Worn Brake Pads or Shoes Severely worn brake pads or drum brake shoes can cause the piston to extend further than it should, which can make the pedal feel lower and softer than normal. Rust on rotors or drums can also create uneven contact and contribute to a spongy feeling. A Compromised Vacuum Servo The vacuum servo (also called a brake booster) amplifies the force you apply to the pedal. If it develops a leak or loses vacuum pressure, your brakes will feel much harder to press – but a partially failing vacuum servo can also contribute to inconsistent pedal feel. Why You Should Not Wait on This Repair A spongy brake pedal is not a “keep an eye on it” problem. Brakes are your car’s most critical safety system. If the pedal fails to build pressure when you need it most – at a stop sign, in traffic, or in an emergency – the consequences can be severe. If your brake fluid is leaking or your master cylinder is failing, the situation can deteriorate quickly. Every mile you drive with a compromised brake system is a risk that is not worth taking. How the Problem Gets Fixed Diagnosing a spongy pedal starts with a thorough inspection of the entire brake system. A technician will check the fluid level and condition, inspect the hoses and lines for leaks, examine the master cylinder, and assess the brake pads, shoes, and rotors for wear or rust. From there, the fix might involve bleeding the brake lines to remove air, replacing worn brake pads or shoes, repairing or replacing a leaking hose, or installing a new master cylinder. In some cases, it is a straightforward job. In others, multiple components need attention at once. Get Your Brakes Checked by Professionals You Can Trust At Don & Joe’s Auto Service in New Castle, IN, the team has been diagnosing and repairing brake systems since 1977. Their ASE-certified technicians use state-of-the-art diagnostic tools to find the real source of the problem – not just the obvious one. Don’t Ignore a Spongy Brake Pedal A spongy brake pedal is your vehicle telling you something is wrong with one of its most important systems. Whether it is air in the lines, a failing master cylinder, or worn brake pads, the fix starts with an honest, accurate diagnosis. Do not wait until the pedal hits the floor. Schedule a suspension and brake service with Don & Joe’s Auto Service today, or call 765-529-3555 to get your brakes inspected by technicians who have earned the community’s trust for over four decades.

Why Your Spongy Brake Pedal Is a Red Flag – and How to Fix It Fast Read More »

7 Signs of Low Transmission Fluid You Shouldn't Ignore

7 Signs of Low Transmission Fluid You Shouldn’t Ignore

7 Signs of Low Transmission Fluid You Shouldn’t Ignore Your car depends on dozens of fluids to keep everything running smoothly, but few are as critical as transmission fluid. When your transmission fluid is low, things can go wrong fast – and if you ignore the early warning signs, you could be looking at serious transmission damage down the road. Whether you drive an automatic or manual transmission vehicle, knowing the symptoms of low transmission fluid can save you a lot of money and frustration. Here’s what to watch for. Why Transmission Fluid Matters Transmission fluids do a lot of heavy lifting inside your vehicle. They lubricate moving parts, help regulate heat, create the hydraulic pressure needed to shift gears, and reduce friction between transmission components. Without enough fluid, those parts grind against each other, overheat, and wear down fast. Low transmission fluid can lead to erratic shifting, strange noises, and eventually a complete transmission repair or replacement. Think of it like motor oil for your engine – if the level drops too low, damage to the vehicle follows quickly. 7 Common Signs of Low Transmission Fluid 1. Delayed or Rough Gear Shifts One of the most noticeable signs your transmission fluid is running low is a change in how your car shifts. You might notice a hesitation when shifting from park to drive, or the gear changes feel jerky and rough instead of smooth. This happens because transmission fluid provides the hydraulic pressure needed to engage each gear. When the fluid is low, that pressure drops and shifting becomes unpredictable. In automatic transmission vehicles especially, this symptom shows up early and clearly. 2. Slipping Gears Gear slipping is when your transmission unexpectedly changes gears on its own, or struggles to stay in the right gear while driving. It can feel like your car is losing power mid-acceleration, which is unsettling – and dangerous. Low fluid levels reduce the fluid pressure needed to hold gear positions properly. If your trans fluid is low enough, the transmission may slip frequently, making the vehicle feel inconsistent and unreliable on the road. 3. Unusual Noises While Driving A healthy transmission runs quietly. If you start hearing whining, grinding, or clunking as your car shifts, that’s a red flag. Low fluid means less lubrication, and without enough lubrication, metal parts inside the transmission begin to make contact in ways they should not. These unusual noises are your transmission asking for help before the wear and tear turns into something much worse. 4. A Burning Smell A burning smell coming from under your hood or beneath the vehicle is never something to ignore. When transmission fluid gets too low, the remaining fluid overheats quickly because it cannot properly manage heat across all the transmission components. Burnt-smelling fluid has a sharp, acrid odor that is different from a coolant or oil smell. If you catch this with your sense of smell while driving, pull over safely and check the fluid level as soon as you can. Continuing to drive risks a full overheat situation. 5. Transmission Fluid Leaking If you notice a puddle forming on your driveway or parking spot, check the color. Automatic transmission fluid is typically bright red when fresh and becomes darker or brown as it ages. A leak is often the root cause of low transmission fluid levels in the first place. The fluid may drip from a faulty seal, a loose transmission pan, or a damaged line. Finding a leak early and fixing it before the level is low is far cheaper than dealing with the damage that follows if you let it go. 6. Check Engine Light or Transmission Warning Your vehicle is always monitoring itself. When the check engine light comes on, many drivers assume it is an engine issue – but the check engine light can also be triggered by transmission problems, including low fluid levels. Some newer vehicles have a dedicated transmission warning light. Either way, do not ignore dashboard alerts. Get the vehicle scanned with a proper computer diagnostics check to find out what is going on before the problem gets worse. 7. Overheating Transmission An overheating transmission is a serious sign of low transmission fluid that needs immediate attention. Transmission fluids are designed to absorb and disperse heat generated during normal driving conditions. When there is not enough fluid, the heat builds up rapidly. You may notice sluggish performance, a burning odor, or your temperature gauge behaving oddly. In some cases, the vehicle may go into a protective “limp mode” to prevent further damage. If this happens, stop driving and have your transmission inspected right away. How to Check Your Transmission Fluid Checking your transmission fluid level is something many drivers can do at home. On most vehicles, you can use the transmission dipstick – similar to how you check the oil – to check the fluid level. Pull out the dipstick to check the level, wipe it clean, reinsert it, and pull it out again to get an accurate reading. If the fluid is low, add fluid using the correct fluid type recommended for your vehicle. Using the wrong fluid or the right fluid in the wrong amount can both cause problems. If you are unsure, it is always worth having a professional check your fluid and inspect for the source of any leak. For vehicles like a CVT transmission or certain four-wheel drive systems, the process can be different and may require a technician to check the fluid and filter properly. When to See a Professional If you notice any of these warning signs, do not wait. Low transmission fluid levels and fluid issues can escalate quickly into costly repairs. When in doubt, have a trusted auto repair shop inspect your vehicle before small problems become big ones. At Don and Joe’s Auto Service, serving Henry County, IN, the ASE-certified technicians have been diagnosing and fixing transmission problems since 1977. Whether you need a fluid change, a transmission repair, or just want

7 Signs of Low Transmission Fluid You Shouldn’t Ignore Read More »

Coolant Reservoir Bubbling: What It Means and How to Fix It Fast

Coolant Reservoir Bubbling: What It Means and How to Fix It Fast

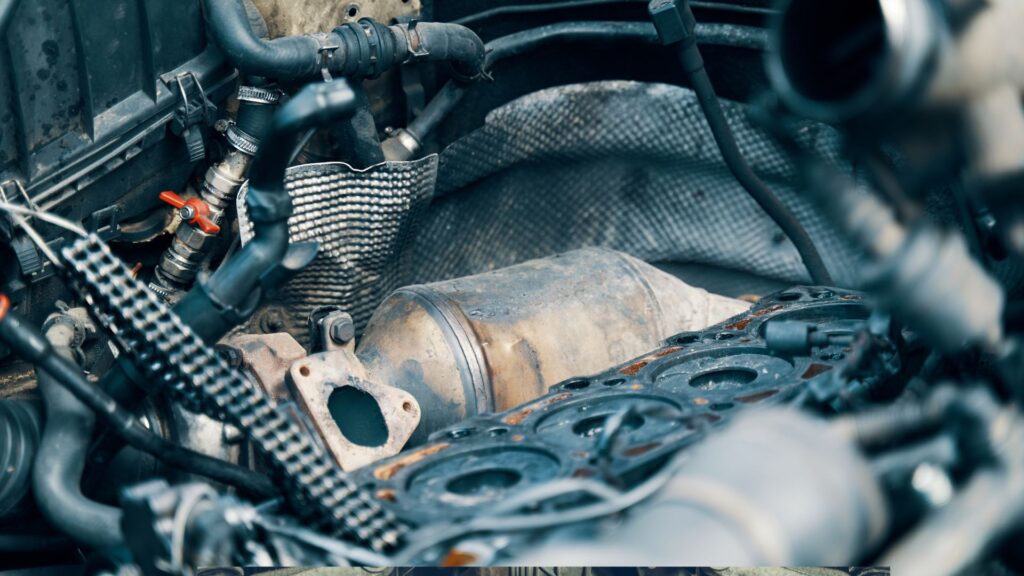
Coolant Reservoir Bubbling: What It Means and How to Fix It Fast You glance under the hood and notice something odd. The coolant reservoir is bubbling like a pot of soup on the stove. It looks alarming, and honestly, it should get your attention right away. Coolant reservoir bubbling is not something you want to ignore. It is often a sign that something is wrong inside your engine, your cooling system, or both. The good news is that catching it early can save you from a much bigger, more expensive problem down the road. What Does a Bubbling Coolant Reservoir Actually Mean? The coolant in your vehicle is designed to absorb heat from the engine and carry it away through the radiator. Under normal conditions, this is a smooth, pressurized process. When you see bubbles in the coolant reservoir, it usually means that process has been disrupted. There are a few different things that can cause bubbles to appear. Some are minor. Others are serious. Understanding the difference matters a lot before you decide what to do next. Air in the Cooling System One of the most common causes of bubbling is trapped air. When air gets into the cooling system, it creates air pockets that do not flow like liquid. As coolant circulates and heats up, these pockets can cause gurgling or bubbling sounds and visible activity in the overflow tank. Air in the cooling system can get in after a coolant change, after cooling system work has been done, or if the coolant level has been allowed to run low. In many cases, you can bleed the system to remove trapped air and the bubbling stops shortly after. A Failing or Stuck Thermostat The thermostat controls when coolant flows from the engine to the radiator. When it works correctly, the thermostat opens once the engine reaches operating temperature, allowing hot coolant to circulate and cool down. If the thermostat sticks closed, coolant cannot move freely. Heat builds up rapidly, and the coolant may begin to boil locally before it ever reaches the radiator. This can cause bubbling in the reservoir and cause your temperature gauge to climb quickly. Replacing the radiator and thermostat together is sometimes the right call when one component has already been under excessive stress. A Faulty Radiator Cap It sounds simple, but a worn-out radiator cap can cause real problems. The rad cap is responsible for maintaining the right system pressure inside the cooling system. If it fails, pressure drops, which lowers the boiling point of the coolant and can cause it to boil even at normal operating temperatures. A new cap is one of the cheapest fixes in automotive repair. If you have not had your pressure cap inspected recently, it is worth having a mechanic check it before assuming the worst. A Blown Head Gasket This is the big one. A blown head gasket is one of the most serious causes of coolant bubbling. The head gasket sits between the cylinder head and the engine block, sealing off coolant passages from the combustion chamber. When head gasket failure occurs, combustion gas can enter the cooling system. These exhaust gases create bubbles in the coolant that are very different from simple air bubbles. This is sometimes described as exhaust gas leaking into the coolant, and it is a sign of significant internal engine damage. How do you know if it is a head gasket problem? Here are the warning signs to watch for: Bubbles in the coolant reservoir that appear quickly after you start the car White smoke coming from the exhaust Coolant loss with no visible coolant on the ground The engine overheating repeatedly even after topping up the coolant level Oil that looks milky or has a frothy appearance A sweet smell coming from the exhaust If you see several of these together, a blown head gasket is very likely the culprit. How Combustion Gases Cause Bubbling To understand the problem clearly, it helps to think about how an internal combustion engine works. The combustion chamber is where fuel and air mix and ignite. This process produces enormous heat and pressure inside each cylinder. The head gasket acts as a barrier between the combustion chamber and the coolant passages. When there is a leak in the head gasket, combustion gas pushes through that breach and enters the cooling system. These combustion gases bubble up through the hot coolant, causing visible bubbling and overheating. A cracked cylinder head or a cracked block can cause the same effect. Coolant boiling under these conditions is a sign of serious internal damage that will only get worse with driving. How to Diagnose Coolant Reservoir Bubbling Before throwing parts at the problem, you need to know what you are actually dealing with. Here is a basic approach to diagnosing bubbling in the reservoir. Check the basics first. Check the coolant level, look for coolant on the ground nearby, and check for white smoke from the exhaust. These three quick checks can give you a lot of information before you dig deeper. Inspect the radiator cap. Remove the coolant cap only when the engine is cold. Inspect the seal and the spring tension. A weak or cracked cap should be replaced with a new cap right away. Watch the reservoir when the engine is running. Start the car and let it warm up. As the thermostat opens, watch the overflow tank carefully. If bubbles start appearing rapidly, especially before the engine reaches full operating temp, that points toward a head gasket issue rather than simple trapped air. Use a combustion leak tester. A chemical test kit can detect combustion gas in the coolant. The tester uses a fluid that changes color if exhaust gases are present in the coolant. This is one of the most reliable ways to confirm or rule out a head gasket leak without tearing the engine apart. Request a pressure test. A pressure test performed by a professional can reveal leaks that

Coolant Reservoir Bubbling: What It Means and How to Fix It Fast Read More »

Schedule

Schedule Your Appointment Today

Your Automotive Repair & Maintenance Service Specialist

What Our Customers Say

Privacy Policy
Manage Consent Preferences
Do Not Share My Information | Conditions of Use | Notice and Take Down Policy | Website Accessibility Policy
© 2026 The content on this website is owned by us and our licensors. Do not copy any content (including images) without our consent.