
Blog

Your blog category

Why Your Car Makes Noise When Accelerating and What to Check First

Why Your Car Makes Noise When Accelerating and What to Check First

Why Your Car Makes Noise When Accelerating and What to Check First You press the gas pedal, and something just sounds off. Maybe it’s a whine, a rattle, or a grinding noise that only shows up when you accelerate. Whatever it is, your car is making noise it wasn’t making before, and that’s never something to ignore. The good news is that most noises during acceleration point to a specific problem. Once you understand the type of noise you’re hearing, you’re already halfway to fixing it. Why Do Cars Make Noise When Accelerating? Your vehicle is made up of hundreds of moving parts. When you press the gas, you’re putting load and stress on the engine, transmission, exhaust system, axle, and more. That added strain can expose weak points that stay quiet at idle but get loud the moment you accelerate. Some sounds are warning signs of minor wear. Others are a sign that something is seriously wrong and you need to pull over as soon as it’s safe. Either way, the sound when accelerating is your car’s way of communicating with you. Common Noises and What They Mean Whining Noise Under the Hood A whining noise during acceleration often points to the transmission or the power steering system. If the whine changes pitch as your speed changes, it could be related to the transmission, low transmission fluid, or a failing bearing inside the gearbox. A power steering pump running low on hydraulic fluid can also produce a whine, especially during acceleration or when turning. Check your fluid levels before assuming the worst. Squealing or Squeaking Noise A high-pitched squeal when you accelerate is usually belt-related. The serpentine belt drives multiple components, including the alternator, power steering pump, and air conditioning compressor. When the serpentine belt is worn, cracked, or loose, it can squeal against the pulley it rides on. A squealing noise can also be related to the brakes. If your brake pads are worn down, they’ll squeal to let you know they need to be replaced. If you hear this, especially during acceleration and then braking, have your brake system looked at right away. Grinding Noises When You Accelerate Grinding noises are harder to ignore, and usually mean metal is contacting metal somewhere it shouldn’t. A grinding noise when accelerating can come from: Worn brake pads grinding against the disc brake rotor A failing wheel bearing creating a rumbling or grinding sensation coming from the wheels CV joints that are dry or damaged, especially if you also notice a clicking noise during turns A scraping noise that appears and disappears with wheel rotation often points to a worn wheel bearing or loose heat shield on the exhaust system. Don’t wait on grinding noises. They tend to get worse fast. Rattling Noise A rattling noise during acceleration can be tricky to pinpoint the exact source because it can come from so many places. Loose heat shields on the exhaust system are one of the most common culprits. The muffler, catalytic converter, or other exhaust components can also rattle if a bracket breaks or a connection loosens up. Inside the engine bay, a rattling can sometimes be tied to a loose belt tensioner, a failing pulley, or even a low oil situation where the engine isn’t getting enough lubrication. If a noise at startup becomes a rattle as you accelerate, check the oil level immediately. Knocking or Ticking Sounds A knocking noise or ticking sound from the engine is a serious red flag. Engine knocking during acceleration often points to problems with combustion timing, spark plug failure, or low oil pressure. The crankshaft and connecting rods rely on proper lubrication to function. When they don’t get it, you’ll hear a knocking or ticking noise that typically gets louder as you increase speed. If you hear a knocking that’s rhythmic and deepens under load, pull over as soon as it’s safe.  Continuing to drive with engine knock can cause major damage. A tick can also come from a fuel injector, which is generally less alarming but still worth having a mechanic inspect. Whistling or Hissing Noise A whistling noise during acceleration usually points to a vacuum leak or an issue with the inlet manifold. The engine relies on a balanced air-to-fuel ratio. When there’s an air leak somewhere in the system, it throws that ratio off, and you’ll often hear a whistle or hiss alongside a rough idle or a Check Engine light. A whistling noise can also be a sign of problems with the exhaust, particularly an exhaust leak where gases are escaping before they should. An exhaust leak near the engine can also create a ticking sound that gets louder as you accelerate. Rumbling Noise A deep rumbling noise, especially during acceleration, often suggests a worn wheel bearing or exhaust issue. A rumbling that changes with vehicle speed and feels like it’s coming from the wheels is a strong indicator of a bad wheel bearing. Left unaddressed, a failing bearing can eventually cause a wheel to lock up. Rumbling that stays consistent regardless of speed is more likely related to the exhaust system, such as a damaged muffler or a loose connection along the exhaust path. What to Check First When your car is making strange noises, here’s a simple starting point before you head to the shop: Check your oil level. Low oil is behind more engine noises than most drivers realize. Look under the hood for obvious issues. A visually loose belt, a cracked hose, or a disconnected vacuum line can sometimes be spotted with a quick look. Check your transmission fluid. Low or dirty transmission fluid is a common trigger for noise when accelerating. Pay attention to when the noise happens. Does it only appear at certain speeds? Only when turning? Only under hard acceleration? This information helps a mechanic diagnose the problem faster. Note any warning lights. A check engine light alongside unusual noises narrows the diagnosis significantly. If you can’t identify the source

Why Your Car Makes Noise When Accelerating and What to Check First Read More »
Why Your Steering Wheel Clicks When Turning and What to Do Next

Why Your Steering Wheel Clicks When Turning and What to Do Next

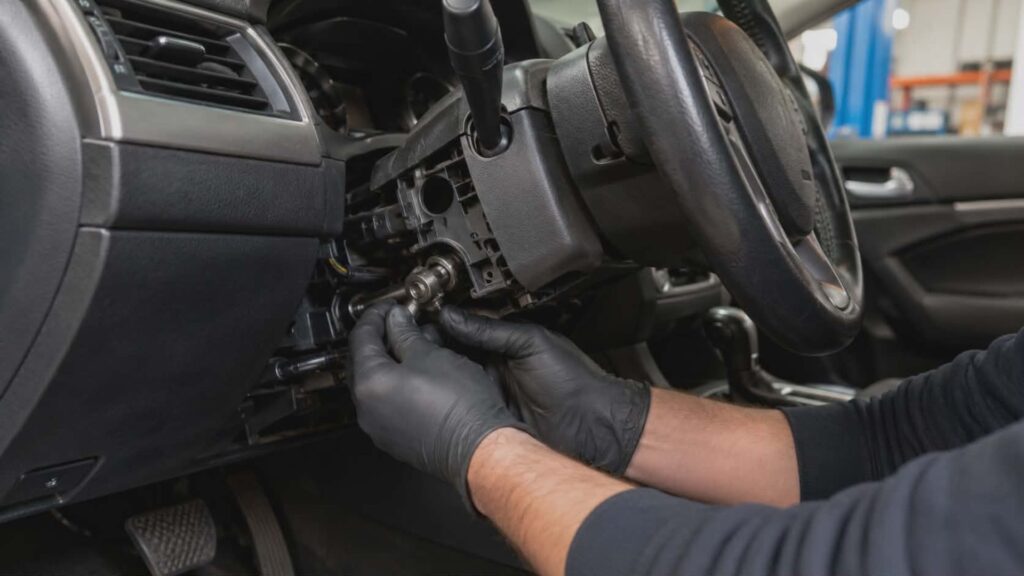
Why Your Steering Wheel Clicks When Turning and What to Do Next That annoying clicking sound every time you turn the wheel is hard to ignore. It might start subtle – just a faint tick when you’re pulling out of a parking space – and before long it’s loud enough to make you wince at every intersection. The good news? A clicking noise when turning usually points to something specific. And the sooner you figure out what’s causing it, the less likely you are to end up with a much bigger repair bill down the road. This guide breaks down the most common reasons your steering wheel clicks when turning, what each sound might mean, and what steps to take next. What Does It Mean When Your Steering Wheel Makes a Clicking Noise? When something in your steering or suspension system starts making noise, your car is essentially giving you a warning signal. The steering wheel connects to a complex network of components – the steering column, joints, shafts, and suspension parts – and any one of them can become a source of noise when they wear out or lose lubrication. Clicking or popping sounds when turning are different from grinding or squealing noises. A clicking sound is typically mechanical in nature, often caused by something that’s loose, worn, or dry. That said, the location and timing of the sound can tell you a lot about what’s actually going on. The Most Common Causes of a Clicking Noise When Turning Worn CV Joint or CV Axle This is the most frequent culprit, especially when you hear a clicking or popping noise during slow, sharp turns. The CV joint – short for constant-velocity joint – is part of the front axle and helps transfer power from the transmission to the front wheels while allowing the suspension to move freely. When the protective rubber boot around a CV joint tears, grease leaks out, and contaminants get in. Over time, the joint wears down and starts to make a clicking sound when you turn the wheel, particularly at low speed. If you notice the clicking noise coming from the front wheel area during tight turns, a worn CV joint is the likely explanation. Left unaddressed, a failing CV axle can eventually break completely, leaving you stranded. It’s not something to put off. Ball Joint and Control Arm Issues The ball joint connects the control arm to the steering knuckle, acting like a pivot point for the front suspension. When ball joint wear becomes significant, it can produce a clunk or popping noise when turning and going over bumps. A worn ball joint doesn’t just cause noise – it affects how the vehicle handles, and in severe cases, it can cause a front wheel to separate from the suspension system entirely. If you’re hearing a clicking or clunking sound that’s more pronounced on one side, the left front or right front ball joint may need attention. Strut or Strut Mount Problems A strut is a major suspension component that absorbs road impact and helps keep your tires in contact with the road. The strut mount sits at the top of the strut assembly and can wear over time, especially in areas with rough roads. When the strut mount deteriorates, you’ll often hear a clunk or popping sound when turning your steering wheel, usually at low speed. The sound may feel like it’s coming from somewhere in the front end of the vehicle rather than directly from the steering wheel itself. Steering Column Issues Sometimes the clicking sound isn’t coming from the suspension at all – it comes from the steering column and may be heard behind the dashboard. Inside the column, there are column bearings, a steering shaft, and an intermediate shaft that all work together to translate your input into actual wheel movement. When column bearings wear out, or the intermediate shaft develops dry spots or loose connections, you’ll hear noises when turning your steering wheel that seem to originate right behind the dashboard. These steering column issues can also cause some looseness or roughness in how the wheel feels. Clock Spring Failure The clock spring is a coiled ribbon of electrical connectors that sits inside the steering wheel column. It maintains continuous electrical contact between the steering wheel controls – things like the horn, cruise control, and airbag – and the rest of the vehicle’s wiring while you turn the steering wheel. When the clock spring wears out or breaks, it can cause an airbag warning light, loss of horn function, or a clicking sound when turning. The clock spring is also responsible for features like a heated steering wheel or steering control buttons, so if those stop working alongside a clicking noise, that’s a telling sign. Low or Dirty Power Steering Fluid If you have hydraulic power steering, the power steering system relies on fluid pressure to make turning easy. Low or dirty power steering fluid can cause a whining noise or grinding noise when you turn, though some drivers describe it as a clicking or ticking sound as well. Dirty power steering fluid or low fluid levels put extra strain on the steering pump and steering rack, and over time that can damage the power steering pump or rack or steering components. Checking the fluid is a simple first step – if it looks dark or smells burnt, it needs to be changed. Debris in the Wheel Well Occasionally, the sound coming from your vehicle when you turn isn’t mechanical at all. A small rock, twig, or piece of road debris can get lodged in the wheel well and rub against the tire or brake components – including disc brake shields – as you turn. Before assuming the worst, it’s worth having someone take a look under the vehicle. Sometimes the simplest explanation is the right one. How to Narrow Down the Source of the Noise Not all clicking sounds when turning are the same. Here are a few

Why Your Steering Wheel Clicks When Turning and What to Do Next Read More »

Why Your Car Makes a Clunk Noise Going Over Bumps and How to Fix It

Why Your Car Makes a Clunk Noise Going Over Bumps and How to Fix It

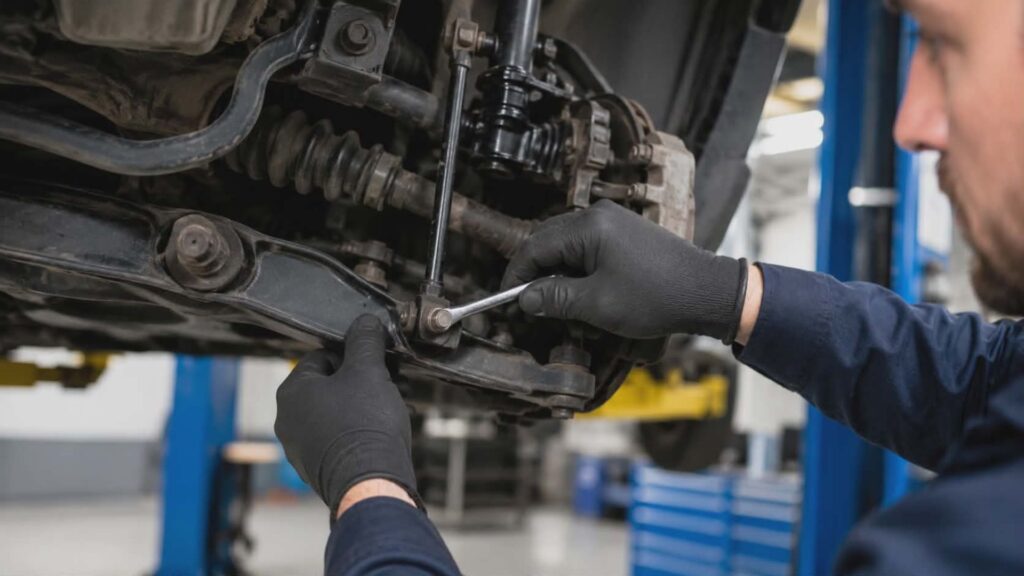
Why Your Car Makes a Clunk Noise Going Over Bumps and How to Fix It That clunking noise you hear when going over bumps is one of those sounds that starts small and gets harder to ignore with every pothole, speed bump, or patch of uneven pavement you drive over. If your vehicle makes a clunking sound every time you hit a bump, something is loose or worn in your suspension or steering system – and it is not going to fix itself. Here is what is likely causing it and what you should do about it. What That Clunking Noise Is Trying to Tell You Your car’s suspension system is designed to absorb impact from the road and keep your tires in contact with the surface beneath them. It handles everything from small bumps to rough roads, and it does so quietly – until something goes wrong. When you hear a clunk going over a bump, it’s usually worn or loose components moving abnormally. Metal hitting metal, rubber bushings that have cracked and lost their cushion, or fasteners that have worked themselves loose can all produce that unmistakable clunk over bumps. Ignoring it can lead to uneven tire wear, poor ride quality, and eventually a failure in your suspension and steering systems that affects how your car handles on the road. Common Causes of a Clunking Noise When Going Over Bumps Worn or Damaged Sway Bar Links and Bushings The sway bar – also called an anti-roll bar – connects the left and right sides of your suspension and helps keep the vehicle stable around turns. The sway bar end links and sway bar bushings hold it in place, but they take a beating on rough roads. When sway bar links or bushings wear out, the sway bar can move freely and produce a loud clunking or rattle every time you go over bumps. A loose sway bar end link is one of the most common causes of front-end clunking, and it is also one of the easier suspension parts to replace. Bad Struts or Shock Absorbers Your shocks and struts are designed to absorb the compression from bumps and keep your vehicle’s suspension from bouncing out of control. When a strut or shock absorber wears out, it loses the ability to control that movement. The result is a clunking sound over bumps, a bouncy ride, and sometimes a feeling that the steering feels loose or unpredictable. Strut mounts can also fail, which adds to the noise coming from the front suspension when hitting bumps at low speeds or driving over bumps at any speed. Worn Control Arm Bushings or Ball Joints The control arm connects your wheel and steering knuckle to the vehicle’s frame. It relies on rubber bushings and ball joints to move smoothly and stay aligned. Control arm bushings wear out over time – natural rubber degrades from heat and constant compression. When they crack or collapse, the control arm can shift and clunk against other suspension components. A worn ball joint is even more serious, as it connects the control arm to the steering knuckle and affects how the tire makes contact with the road. A failing ball joint can cause a clunking noise in the suspension and, in severe cases, dangerous handling. Loose or Worn Tie Rods Tie rods and tie rod ends connect your steering wheel to the front wheels. When they become loose or worn, you may hear a clunking noise when going over bumps and notice the steering feels vague or pulls to one side. Worn tie rods can affect your ability to steer accurately, which makes this a safety issue worth addressing quickly. Other Culprits Worth Checking Not every clunk comes from deep in the suspension. Sometimes the culprit is simpler – a loose heat shield around the exhaust, a skid plate that has shifted, or an axle with a worn CV joint. A quick inspection can help a technician identify the source of the sound before it becomes a bigger problem. How to Fix a Clunking Suspension The fix depends entirely on what is causing the clunking issue. Sway bar links or bushings are typically inexpensive and quick to replace. Shocks, struts, and strut mounts take a bit more labor. Ball joints and control arm bushings may require more involved work and need to be properly torqued to spec to prevent further damage to the entire suspension. The important thing is getting a proper suspension inspection so nothing gets missed. At Don and Joe’s Auto Service in New Castle, IN, the ASE-certified technicians have been diagnosing clunking suspension problems since 1977. They use up-to-date diagnostic tools to find worn or damaged suspension components fast and get your vehicle back on the road safely. Conclusion A clunk over bumps is your vehicle’s way of telling you something needs attention in the suspension or steering components. The longer you wait, the more wear spreads to surrounding parts. If your vehicle makes a clunking noise every time you drive over bumps, cracks in the road, or uneven pavement, bring it in for a suspension inspection before the problem grows. Call Don and Joe’s Auto Service at 765-529-3555 to schedule your auto repair today.

Why Your Car Makes a Clunk Noise Going Over Bumps and How to Fix It Read More »

Timing Belt vs Timing Chain: Key Differences, Costs, and Which One Lasts Longer

Timing Belt vs Timing Chain: Key Differences, Costs, and Which One Lasts Longer

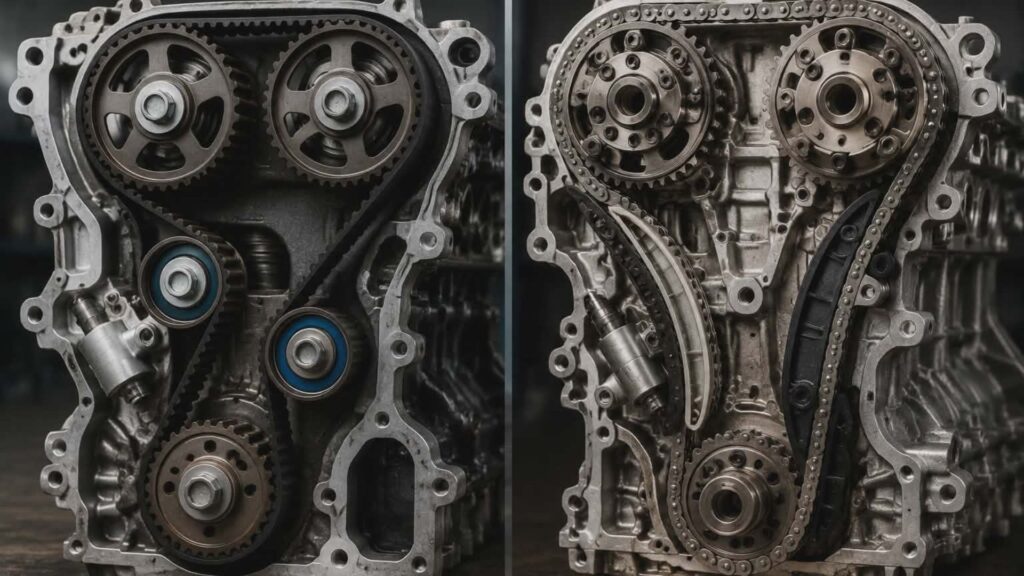
Timing Belt vs Timing Chain: Key Differences, Costs, and Which One Lasts Longer If you’ve ever had a mechanic mention your timing belt or timing chain and felt completely lost, you’re not alone. Most drivers know these parts exist somewhere inside the engine, but few understand what they actually do – or why they matter so much. Getting clear on the difference between a timing belt and a timing chain could save you from a very expensive surprise down the road. What Is a Timing System and Why Does It Matter? Your engine works by coordinating a precise sequence of events happening hundreds of times per minute. The crankshaft moves the pistons up and down inside the cylinders, while the camshaft controls when the valves open and close to let fuel and air in and push exhaust out. If those two components fall out of sync, even slightly, the engine stops running correctly – or stops running at all. That’s where the timing system comes in. Whether it’s a belt or chain, this component links the crankshaft and camshaft together and keeps everything firing in the right order. It’s one of the most important parts in a four-stroke engine, and when it fails, the consequences can be serious. Timing Belt vs Timing Chain: What’s the Difference? Let’s learn the difference between these two components before diving into which one is better for your situation. How a Timing Belt Works A timing belt is made of reinforced rubber – specifically, a rubber belt with nylon cords or fiberglass woven in to reinforce it. The belt wraps around the crankshaft pulley and the camshaft pulley, keeping both in sync. In some vehicles, it also drives the water pump, which is worth knowing if you’re planning maintenance. The timing belt works quietly and smoothly, which is one reason automakers started using them. Belts are quieter than metal chains and lighter, which helps improve fuel efficiency. Many Hondas and other vehicles were widely equipped with timing belts in the 1980s and 1990s. How a Timing Chain Functions A timing chain is made of metal, similar in design to a bicycle chain. It connects the crankshaft and camshaft using metal links and runs inside the engine, where it can be lubricated by motor oil. Because the chain functions inside the oiled environment of the engine, it doesn’t require the same kind of scheduled replacement that a rubber belt does. Guides and tensioners keep the chain running properly. A tensioner maintains the right amount of pressure so the chain doesn’t become slack. A stretched chain can cause timing issues that affect performance and, if ignored, lead to serious engine damage. Key Differences Between Timing Belts and Chains Understanding the key differences comes down to a few important categories. Material: A timing belt is made of reinforced rubber. A timing chain is made of metal. Location: The timing belt runs outside the engine, behind a protective cover. The timing chain runs inside the engine, bathed in oil. Noise: Belts are quieter during operation. Chains are generally louder but not always noticeably so. Lifespan: This is where things get interesting. How Long Do Timing Belts and Chains Last? How long do timing belts last? Most timing belts need to be replaced every 60,000 to 100,000 miles. Your owner’s manual will list the specific replacement interval for your vehicle. Skipping that service window is a gamble – belt failure doesn’t give much warning, and if the belt breaks while you’re driving, the damage can be catastrophic. In interference engines – where the valves and pistons share the same space at different times – a broken belt means the valves and pistons collide. That’s engine damage that could cost thousands in professional engine repair services. How long do timing chains last? Timing chains last significantly longer than belts. Many timing chains are designed to last the lifetime of the engine if the vehicle is properly maintained. That said, they’re not immune to failure over time. Worn guides and tensioners, or poor maintenance habits, can cause problems. Advantages and Disadvantages of Timing Belts and Chains Advantages of Timing Belts Quieter operation Lighter weight, which can improve efficiency Lower upfront replacement cost compared to chain replacement Disadvantages of Timing Belts Must be replaced on a set schedule Belt breaks can cause major engine damage, especially in interference engines May cost more over a vehicle’s lifetime due to repeat replacements Advantages of Timing Chains Longer lifespan – chains last longer than belts in most cases Lubricated by engine oil, reducing wear Less likely to fail suddenly without early warning signs Disadvantages of Timing Chains Heavier and can be noisier Chain replacement is more labor-intensive if it fails Requires regular oil changes to keep the chain properly lubricated Which Vehicles Use Timing Belts vs Timing Chains? Whether your vehicle uses a belt or a chain depends largely on its make, model, and year. Many older vehicles and some diesel engine models are equipped with timing belts. Some diesel trucks and SUVs use timing belts. Larger vehicles like the Chevrolet Tahoe, Chevrolet Silverado, and other full-size trucks and SUVs from Chevrolet tend to use timing chains in their modern engines. Newer vehicles across most manufacturers have shifted toward timing chains for their longevity. That said, some compact sport utility vehicles and older cars still use belts, so it’s always worth checking your service records or asking a trusted mechanic. Warning Signs Your Timing Belt or Chain Needs Attention Don’t ignore these warning signs. Whether you have a belt or a chain, watch for: A ticking or rattling noise from the front of the engine The engine is misfiring or running rough Oil is leaking near the timing belt cover The check engine light appears alongside performance issues If you notice any of these, bring your vehicle in for advanced computer diagnostics right away. Catching timing component problems early can prevent much more expensive repairs later. What Does Timing Belt and Timing Chain Service Cost?

Timing Belt vs Timing Chain: Key Differences, Costs, and Which One Lasts Longer Read More »

Why Your Brake Pedal Travels To Floor And What To Do Next

Why Your Brake Pedal Travels To Floor And What To Do Next

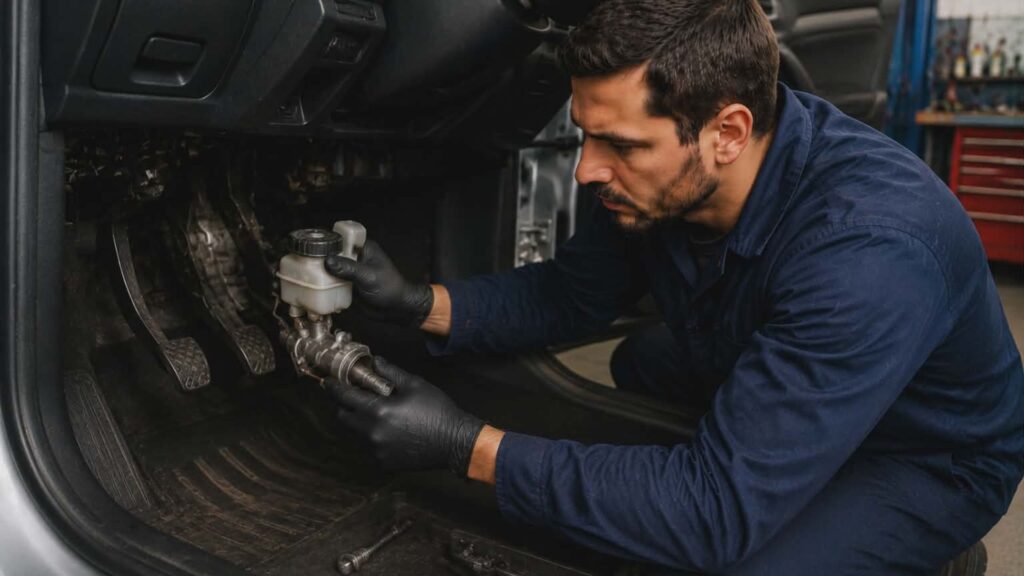
Why Your Brake Pedal Travels To Floor And What To Do Next There are few things more unsettling than pressing the brake pedal and feeling it sink toward the floor. It’s the kind of moment that makes your heart race, especially when you’re moving at speed on the road. If this has happened to you, you’re not alone – and more importantly, it’s a problem you should never ignore. Understanding why your brake pedal goes to the floor is the first step toward fixing it safely. How Brakes Work In The First Place Before diving into what goes wrong, it helps to know how brakes work under normal conditions. When you step on the brake pedal, your foot force is multiplied through a hydraulic system. Brake fluid moves through brake lines, applying pressure to calipers or wheel cylinders, which then squeeze against the rotor or drum to slow the vehicle. Power brakes also rely on a brake booster – typically powered by engine vacuum – to give you power assist, so pressing the pedal doesn’t require excessive effort. When any part of this chain breaks down, pedal travel increases and stopping power drops. Common Causes Of A Brake Pedal That Goes To The Floor There isn’t just one reason a brake pedal sinks to the floor. Several distinct problems can cause this, and each one requires a different fix. A Failing Master Cylinder The master cylinder is the heart of your car’s hydraulic brake system. It converts the pressure from your foot into hydraulic pressure that activates the brakes at each wheel. When the master cylinder starts to fail – often because of a worn internal piston or seal – brake fluid can bypass internally without doing any work. The result is a low brake pedal that sinks when you press the pedal, even though there’s no visible fluid leak outside the system. Installing a new master cylinder is often the fix for this specific issue. Air In The Brake Lines Brake fluid is incompressible, which is exactly what makes hydraulic brakes effective. But air compresses easily, and when air enters the brake lines, the pedal feels spongy or squishy instead of firm. You might notice the pedal sometimes goes further than usual, or that pedal feels soft every time you hit the brakes. Bleeding the brakes – a process where a mechanic forces fluid through the system to get the air out – typically resolves this. If the air keeps coming back, there’s likely a fluid leak somewhere letting air in. A Brake Fluid Leak A leak is one of the most common causes of brake pedal problems. Brake fluid can escape from several points: a damaged brake line, a defective caliper, worn wheel cylinders, or a cracked brake fluid reservoir. When fluid escapes the system, hydraulic pressure drops, and the pedal doesn’t feel right. You may notice a puddle of fluid under your vehicle, or your brake fluid reservoir may be running low. Either way, there’s a leak that needs to be located and repaired before it gets worse. A Faulty Brake Booster The brake booster uses engine vacuum to provide power assist, so the pedal requires less foot effort. When the booster fails, you lose that power assist, and the pedal doesn’t feel normal – it may feel hard to push or oddly soft depending on how the failure occurs. A defective vacuum servo won’t always cause the brake pedal to go all the way to the floor, but it can contribute to a low brake pedal and reduced braking performance. A technician can diagnose booster problems by checking vacuum pressure and testing pedal behavior with the engine off versus running. What To Do If Your Brake Pedal Sinks While Driving If your brake pedal goes to the floor while you’re driving, stay calm and take these steps: Try pumping the brake pedal a few times quickly to build hydraulic pressure. This can temporarily restore some braking force. Use the parking brake carefully to help slow the vehicle if the service brakes aren’t working. Downshift if you’re driving a manual transmission to use engine braking. Move to the side of the road as safely as possible and turn on your hazard lights. Do not attempt to drive the vehicle further. Call for help. A brake pedal that goes to the floor is an emergency. Treating it as anything less risks a serious accident. Why You Shouldn’t Wait for Brake Inspections Brake problems rarely fix themselves, and they almost always get worse with time. If your pedal always feels a little low, or the pedal doesn’t feel right but you’re managing, that’s not a reason to wait. That’s a warning. At Don and Joe’s Auto Service in Henry County, IN, the team provides thorough brake inspections as part of their suspension and brake repair services. We can diagnose everything from a worn brake pad to a failing master cylinder using advanced computer diagnostics for vehicles, ensuring nothing gets missed. Our routine preventative maintenance services also include fluid checks that catch a low brake fluid level before it becomes a road emergency. And if a bigger repair is needed, our comprehensive auto repair services cover everything from a new brake line to a complete brake system overhaul. Conclusion A brake pedal that travels to the floor is never something to shrug off. Whether the cause is a worn master cylinder, air in the lines, a fluid leak, or a failing booster, the fix starts with a proper diagnosis from someone who knows the automotive industry inside and out. Don and Joe’s Auto Service has been keeping drivers in Henry County, IN, safe since 1977. Call us at 765-529-3555 or to schedule an inspection before a small brake problem becomes a dangerous one.

Why Your Brake Pedal Travels To Floor And What To Do Next Read More »

Why Does My Car Shake When I Brake? Common Causes and How To Fix It

Why Does My Car Shake When I Brake? Common Causes and How To Fix It

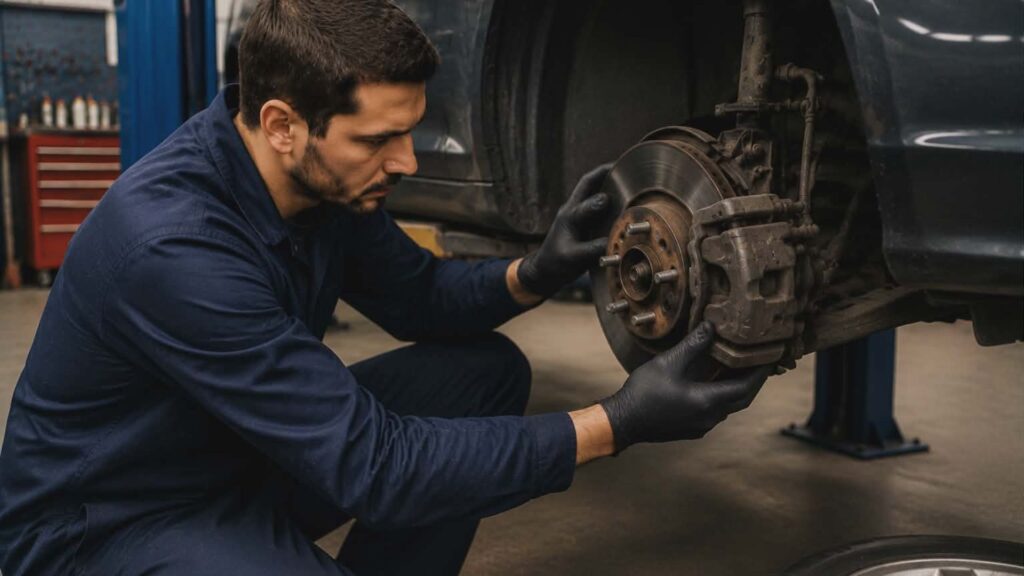
Why Does My Car Shake When I Brake? Common Causes and How To Fix It That unsettling shudder you feel when slowing down is more than just annoying. It is your vehicle telling you something is wrong. If your car shakes when you brake has become a regular occurrence, understanding what is behind it can save you time, money, and a whole lot of stress. Let’s break down the common causes of car shaking during braking and what you can actually do about it. How Brakes Work – A Quick Refresher Before diving into problems, it helps to understand the basics. When you press the brake pedal, brake fluid transfers the force from your foot to the brake components at each wheel. For disc brakes, brake pads clamp down onto a rotor, creating friction that slows the car. Drum brakes work slightly differently, but the principle is the same: controlled friction brings your vehicle to a stop. When any part of this process is off, you can feel it – sometimes through the pedal, sometimes through the steering wheel, and sometimes through the entire car. Common Causes of Car Shaking When You Brake Warped or Uneven Rotors This is the most common reason a car shakes when braking. Rotors are the large metal discs that brake pads clamp against to slow your vehicle. Over time, heat, hard braking, and everyday wear cause rotors to lose their flat, even surface. When rotors are warped or have developed thickness variation, the brake pads cannot make smooth, consistent contact with the rotor. Instead, you get a pulsation – that rhythmic shake or vibration you feel when you apply the brakes. Rotor thickness variation can make the brake pedal pulse, grab, or vibrate rapidly, depending on how uneven the surface has become. A warped rotor does not fix itself. Getting rotors resurfaced or replaced is the proper way to resolve the issue. Worn-Out Brake Pads Brake pads wear down over time. That is just how friction works. Worn-out brake pads lose the material needed to grip the rotor evenly, which can cause vibration and even a high-pitched squealing sound. When brake pads are too thin, they contact the rotor unevenly, which can cause the car to shake when you brake. In severe cases, the metal backing plate of the pad makes direct contact with the rotor, which can cause brake damage quickly and lead to costly repairs. Brake pad replacement is one of the most straightforward fixes in the brake system, and it should never be put off. Seized or Sticky Brake Calipers The caliper is the component that holds the brake pads and squeezes them onto the rotor when you press the brake pedal. If a caliper gets stuck or seizes up, it can apply uneven pressure to the brake pads. This uneven clamping can cause brake drag on the rotor, generate excess heat, and make your car vibrate or even pull to one side while braking. You might also notice a burning smell after braking hard. Faulty brake calipers are a safety issue that needs immediate attention. Issues with Brake Fluid or the Brake Booster Low or contaminated brake fluid can affect how consistently pressure is applied throughout the brake system. If the master cylinder or brake booster is not functioning properly, you may notice inconsistent pedal feel and vibration in the steering wheel when you press the brake. Keeping brake fluid clean and at the correct level is a simple part of routine preventative maintenance services that often gets overlooked. Worn or Damaged Suspension Components Not every shake when braking comes from the brake system itself. Worn or damaged suspension parts – like worn wheel bearings or loose steering components – can cause the car to shake, especially at higher speeds or when you apply the brakes. If your steering wheel wiggles or the front end of the car feels loose during braking, worn suspension could be to blame. Wheel alignment and tire balance issues can also contribute to uneven tire wear and braking instability. When Does the Shaking Happen? Paying attention to when the shaking occurs helps narrow down the cause. Shaking at high speeds or highway speeds when braking often points to warped rotors or tire balance issues Shaking that starts around 40 mph when you press the brake – can indicate rotor or pad problems, or even wheel bearings Shaking only when braking hard – may suggest the rotors are warped from excessive heat The steering wheel shakes when braking, but the pedal feels fine – often tied to the front brakes or suspension What To Do If Your Car Is Vibrating When You Brake Do not ignore it. Braking issues tend to get worse – and more expensive – the longer they go unaddressed. A brake inspection can identify whether the problem is with your rotors and pads, calipers, brake fluid, or something further up the line, like the suspension. At Don and Joe’s Auto Service, our technicians will diagnose the problem accurately using advanced vehicle computer diagnostics and handle everything from brake pad replacement to full suspension and brake repair. We also offer expert auto repair services and professional driveline repair services for issues that go beyond the brake system. Corrosion, dirt and debris, and braking habits all play a role in how quickly brake components wear. Getting a vehicle inspection done before problems snowball is always the smarter move. If you have had new brakes put on recently and still feel a shake, do not assume the brake job was incomplete – let a professional inspect the full system to fix the root cause. Conclusion A car that shakes when braking is not something to ignore or delay. From a warped rotor to worn-out brake pads or a stuck caliper, there are several fixable reasons your car is doing what it is doing. The team at Don and Joe’s Auto Service in Henry County, IN, has been diagnosing and repairing these issues since 1977.

Why Does My Car Shake When I Brake? Common Causes and How To Fix It Read More »

What Causes Steering Wheel Shudder and How to Fix It Fast

What Causes Steering Wheel Shudder and How to Fix It Fast

What Causes Steering Wheel Shudder and How to Fix It Fast If you have noticed your steering wheel shaking while driving, you already know how unsettling it feels. That vibration in the steering wheel is not just annoying – it is your vehicle trying to tell you something is wrong. The good news is that most causes are fixable, and catching them early can save you from more costly repairs down the road. Why Is My Steering Wheel Shaking? A shaking steering wheel rarely happens without reason. There are several possible causes, and identifying the right one is the first step toward a smoother and safer ride. The cause of steering wheel shaking can range from something as simple as unbalanced tires to more serious suspension and steering issues. Understanding the reasons behind the shake, and acting on them quickly, is what separates a minor fix from a major repair bill. Common Causes of Steering Wheel Vibration Tire Problems Tire issues are the most common cause of steering wheel vibration. When your tires are out of balance, worn unevenly, or have flat spots from sitting too long, tires can cause vibrations that travel directly into the steering wheel. You might notice the steering wheel shakes when driving at highway speeds or around 50-55 mph, and the shaking may ease off at lower or higher speeds. Uneven tire wear, improper inflation, or damaged tires all affect weight distribution across the axle. If the steering wheel shakes at high speeds, start with a tire inspection. Wheel Alignment Issues Misaligned wheels can cause your steering wheel to pull to one side and wobble over time. Poor wheel alignment puts uneven pressure on your tires and steering components, which can lead to uneven tire wear and a shaky steering wheel over time. Misalignment often develops gradually, so drivers do not always notice it right away. Getting an alignment check is a basic part of regular maintenance that is easy to overlook but important for your driving experience and tire life. Warped Brake Rotors If your steering wheel shakes when braking or the steering wheel vibrates, specifically when you press the brake pedal, the problem is likely due to warped brake rotors. Brake rotors can warp from heat buildup, heavy use, or age, causing the steering wheel to shake when braking – a sensation many drivers describe. This is a brake system issue that should not be ignored. Worn brake pads can also contribute, and a stuck brake caliper can add to the problem by applying uneven pressure. If your car shakes when braking, get your brake system inspected as soon as possible. Suspension Component Wear Your vehicle’s suspension is designed to absorb road conditions and keep your tires in contact with the road surface. When suspension components like ball joints, control arms, or wheel bearings wear out, you lose that stability. This can lead to steering wheel wobble, shaking during acceleration, and a general loss of steering control or responsiveness. Worn wheel bearings, in particular, can cause a bearing-related hum or shake that gets worse with speed. If your steering wheel shakes when driving at 60 mph or higher, worn suspension parts may be the underlying issue. Power Steering System Faults A failing power steering system can also cause a shaky steering wheel, particularly when turning. Low power steering fluid, a worn pump, or damaged steering system components can make the steering wheel feel unresponsive or cause shaking or vibrations at low speeds during turns. This is one of the less obvious potential causes, but it is worth having your suspension and steering checked together since these systems work closely with one another. Is It Safe to Drive With a Shaking Steering Wheel? In most cases, it is not safe to drive with a shaking steering wheel for long. A vibrating steering wheel signals that something in your vehicle needs attention. Ignoring it can cause the underlying issues to get worse and may create dangerous driving conditions, especially at highway speeds. The steering wheel may be shaking for a variety of reasons, but none of them should be dismissed. If your steering wheel is shaking while driving, get it looked at by a qualified mechanic as soon as you can. How to Fix a Shaking Steering Wheel Fixing the problem starts with an accurate diagnosis. At Don and Joe’s Auto Service, our ASE-certified technicians use advanced computer diagnostics to pinpoint the exact cause of steering wheel shaking quickly and accurately. From there, the fix depends on what’s found: Tire balancing or replacement for tire-related vibration Wheel alignment correction for misalignment issues Brake rotor resurfacing or replacement for steering wheel shaking when braking Suspension component repair or replacement for worn ball joints, bearings, or control arms Brake pad and brake caliper service for brake system concerns Our team handles all of this through our suspension and brake repair services, driveline and transmission repair, and preventative maintenance services – all backed by a 1-year warranty on most parts and labor. Conclusion A shaky steering wheel is a warning you should not ignore. Whether it is a tire issue, warped brake rotors, or worn suspension components, the fix starts with knowing what you are dealing with. At Don and Joe’s Auto Service in Henry County, IN, our team has been diagnosing and repairing these issues since 1977. Do not wait for a small shake to become a big problem. Explore our comprehensive auto repair services or call us today at 765-529-3555.

What Causes Steering Wheel Shudder and How to Fix It Fast Read More »

Why Your Car Pulls To One Side When Braking And How To Fix It Fast

Why Your Car Pulls To One Side When Braking And How To Fix It Fast

Why Your Car Pulls To One Side When Braking And How To Fix It Fast There are few things more unsettling than pressing the brake pedal and feeling your car veer to one side. One moment you’re driving straight, and the next your steering wheel is tugging left or right without you asking it to. It’s not just annoying – it’s a safety issue that deserves immediate attention. If your car pulls to one side when braking, the problem could be coming from several different places. Understanding what’s behind it helps you act faster and smarter. What Causes a Car to Pull to One Side When Braking? This is one of the most common brake complaints drivers bring into the shop. The root cause usually comes down to uneven braking – meaning one side of your vehicle is applying more or less braking force than the other. When that imbalance happens, the car will pull toward the side with the more responsive brake. Here are the most likely culprits. Brake Caliper Issues A sticking brake caliper is one of the most frequent causes of pulling when braking. The caliper houses a piston that squeezes the brake pads against the rotor to create friction and slow the vehicle. When a caliper on one side seizes or sticks, it can either over-apply or under-apply braking pressure compared to the opposite side. If one brake caliper is dragging, you’ll often notice the car pulling to that side even when you’re not actively hitting the brakes. You may also smell something burning near that wheel after a drive. Uneven Brake Pad Wear Worn brake pads don’t always wear evenly across both sides. Uneven brake pad wear creates an uneven braking effect because one front or rear brake has more friction material than the other. This imbalance can cause the car to pull to the side where the pads are more worn down. Regular brake inspections help catch this before it becomes a serious issue. A Collapsed or Restricted Brake Hose A brake hose that’s deteriorated internally can restrict brake fluid flow to one caliper. This hydraulic imbalance means braking pressure isn’t distributed evenly, which can cause your car to pull to one side when you apply the brakes. A collapsed brake hose is easy to overlook during a visual inspection, which is why thorough diagnostic work matters. Brake Rotor Problems Warped or unevenly worn brake rotors can also cause pulling. When the rotor on one side is significantly different from the other in terms of thickness or surface condition, it affects how well the caliper can grip and create consistent friction. Uneven rotor wear is a common reason drivers feel a pulsing sensation alongside the steering pull. Suspension and Steering Issues Not every pull comes directly from the brake system. Worn or damaged suspension components can affect how your car responds under hard braking. A damaged control arm, worn bushing, or a failing tie rod end can all cause the vehicle to pull when weight shifts forward during braking. Suspension and steering play a bigger role in brake behavior than most people realize. If your car veers to one side even at low speeds or during light braking, damaged suspension components can affect the alignment and handling of the vehicle – leading to pulling that gets worse over time. Wheel Alignment and Tire Issues An alignment issue that’s been ignored can become much more noticeable when you brake. Improper wheel alignment causes uneven tire contact with the road, and under braking, that uneven contact can cause the vehicle to pull left or right noticeably. Uneven tire pressure is another overlooked factor. If the tire on one side is significantly under-inflated compared to the other, it changes how that tire grips during braking. Checking cold inflation pressure regularly is a simple habit that can prevent this. Uneven tire wear across the axle can also lead to uneven braking behavior and steering pull. How to Diagnose the Issue Correctly Trying to guess what could be causing your pull without a proper inspection is likely to cause problems. A mechanic with the right tools can quickly identify whether you’re dealing with a brake caliper problem, a suspension component failure, brake lines, or a wheel alignment concern. At Don & Joe’s Auto Service in Henry County, IN, the team uses advanced computer diagnostics to get accurate readings on what’s actually happening with your vehicle. Combined with hands-on inspection, this approach helps diagnose the issue without guesswork. How to Fix a Car That Pulls to One Side When Braking The fix depends entirely on the cause. Brake caliper issues may require a replacement or rebuild. Uneven brake pads need replacing – often in pairs to keep braking pressure balanced. A bad brake hose needs to be swapped out before it causes the vehicle’s braking to deteriorate further. Rotor replacement or resurfacing may be needed alongside pad work. For suspension-related pulling, the solution could involve replacing a tie rod, control arm, or bushing – and following up with a proper wheel alignment. Don & Joe’s offers suspension and brake repair services and comprehensive auto repair services to handle all of these repairs under one roof. Keeping up with preventative maintenance services can also help you catch these problems before they cause the car to pull unexpectedly. Conclusion A car that pulls to one side when braking is telling you something is wrong – and ignoring it only makes the problem with your brakes worse over time. Whether it’s a sticking brake caliper, uneven wear, a suspension fault, or a tire issue, the fix starts with an honest diagnosis. Don & Joe’s Auto Service in Henry County, IN, has been helping drivers get their car back to driving straight since 1977. Call 765-529-3555 to schedule your inspection today.

Why Your Car Pulls To One Side When Braking And How To Fix It Fast Read More »

Hybrid Battery Lifespan: How Long It Lasts and How to Extend It

Hybrid Battery Lifespan: How Long It Lasts and How to Extend It

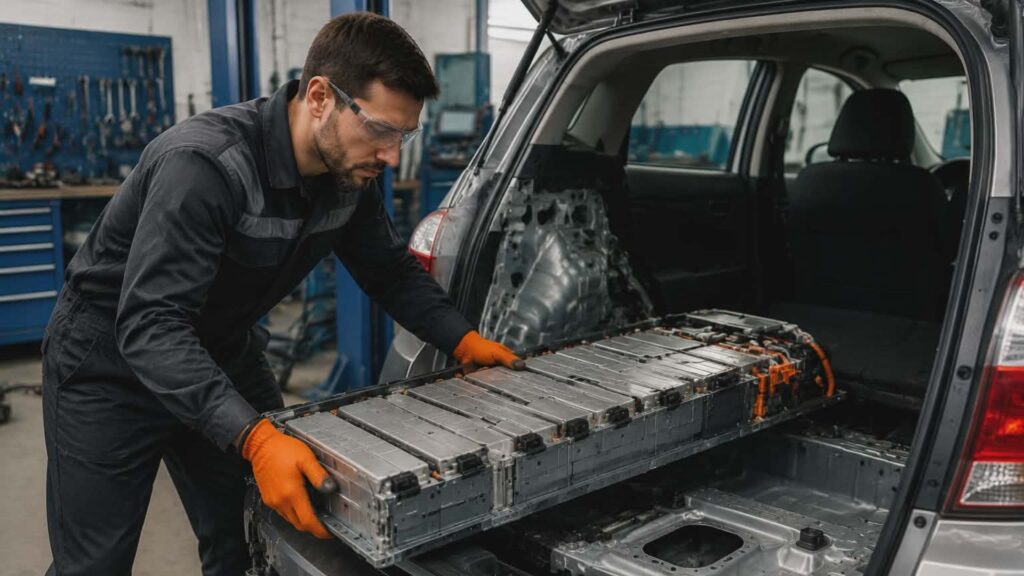
Hybrid Battery Lifespan: How Long It Lasts and How to Extend It If you drive a hybrid vehicle, the battery is probably the one thing that keeps you up at night. How long will it last? What happens when it goes? Is there anything you can actually do to make it last longer? These are fair questions, and you deserve straight answers. This article breaks down everything you need to know about hybrid battery lifespan, what affects it, and practical steps you can take to get the most out of it. Whether you just bought a hybrid or you have been driving one for years, this is worth reading. What Is a Hybrid Battery and Why Does It Matter? A hybrid vehicle uses two power sources – a traditional internal combustion engine and a large rechargeable battery pack. That battery pack is what sets hybrids apart. It powers an electric motor that works alongside the gas engine to improve fuel efficiency and reduce emissions. Unlike the small 12-volt battery that starts your engine, the hybrid battery is a high-voltage system, often between 100 and 300 volts, depending on the vehicle. It is a critical component, and replacing it is not cheap. That is exactly why understanding its lifespan matters so much to hybrid owners. How Long Does a Hybrid Battery Last? Here is the honest answer: most hybrid batteries are designed to last between 8 and 15 years, or roughly 100,000 to 150,000 miles. Some well-maintained batteries push past that range, while others start showing problems earlier. A lot depends on the make and model of your vehicle. Toyota and Honda hybrids, for example, have earned a strong reputation for battery longevity. Many drivers report their batteries lasting well beyond the 10-year mark with proper care. What the Manufacturers Say Most hybrid manufacturers back their batteries with warranties that cover 8 years or 100,000 miles, whichever comes first. Some states have stricter requirements that push that warranty to 10 years or 150,000 miles. After the warranty period, you are on your own – which makes knowing how to protect it even more important. Signs Your Hybrid Battery May Be Failing Your vehicle will usually give you warning signs before the battery completely gives out. Watch for these common indicators: A noticeable drop in fuel economy The battery charge is fluctuating more than usual The internal combustion engine is running more frequently than it used to Warning lights on your dashboard, especially those related to the hybrid system Reduced power or sluggish acceleration If you notice any of these, it is worth getting a proper inspection sooner rather than later. At Don and Joe’s Auto Service in Henry County, IN, the team uses advanced computer diagnostics to accurately assess your hybrid system and identify issues before they turn into expensive repairs. What Affects Hybrid Battery Lifespan? Understanding what shortens – or extends – your battery’s life helps you make smarter decisions every day. There are several key factors at play. Temperature Extremes Heat is one of the biggest enemies of hybrid batteries. High temperatures accelerate the chemical degradation inside the battery cells, shortening the overall lifespan. Cold temperatures are not great either – they temporarily reduce battery capacity, though they tend to cause less long-term damage than sustained heat. Indiana winters and summers both put stress on your hybrid system. If your vehicle sits outside in extreme heat for extended periods, that heat exposure adds up over time. Driving Habits How you drive has a surprisingly large impact on battery health. Frequent hard accelerations and heavy braking force the battery to work harder and cycle more aggressively. Hybrid batteries are built to handle moderate charge and discharge cycles, not constant extreme demands. Smooth, consistent driving – the kind that lets the regenerative braking system do its job properly – is genuinely better for battery longevity. You are not just saving fuel when you drive calmly, you are protecting a major investment. State of Charge Habits Hybrid batteries are happiest when kept in a moderate state of charge – not fully drained and not consistently overcharged. The battery management system in your vehicle handles most of this automatically, but your driving patterns influence where the charge tends to sit. Short trips that never allow the battery to cycle properly can cause issues over time. Similarly, leaving your vehicle sitting for extended periods without driving it can degrade battery performance. Maintenance and System Health A hybrid battery does not operate in isolation. It is connected to your vehicle’s cooling system, electrical system, and overall powertrain health. If other components are not working correctly, the battery works harder to compensate. Keeping up with routine vehicle maintenance – including the hybrid battery cooling system – directly supports battery longevity. Don and Joe’s Auto Service offers preventative maintenance services that keep your entire vehicle in top condition, which in turn helps protect your hybrid battery. How to Extend Your Hybrid Battery Lifespan The good news is that you have more control over this than most people realize. A few consistent habits can add years to your battery’s life. Keep Up with Cooling System Maintenance Hybrid batteries generate heat during operation, and most vehicles use an active cooling system to manage that heat. If the battery cooling fan or vent becomes clogged or stops working, heat builds up inside the battery pack and accelerates cell degradation. Make sure the cabin air intake for the battery cooling system stays clean. In many vehicles, this vent is located in the cabin, near the rear seat or trunk area. Keeping it clear of debris is simple but often overlooked. Proper automotive heating and cooling repair extends beyond just your cabin comfort – it protects critical systems like your hybrid battery. Avoid Extreme Temperatures When Possible While you cannot control the weather in Henry County, IN, you can take small steps to reduce temperature exposure. Parking in a garage or shaded area during the hot summer months reduces the amount

Hybrid Battery Lifespan: How Long It Lasts and How to Extend It Read More »

Car Maintenance By Mileage: A Smart Schedule To Keep Your Ride Reliable

Car Maintenance By Mileage: A Smart Schedule To Keep Your Ride Reliable

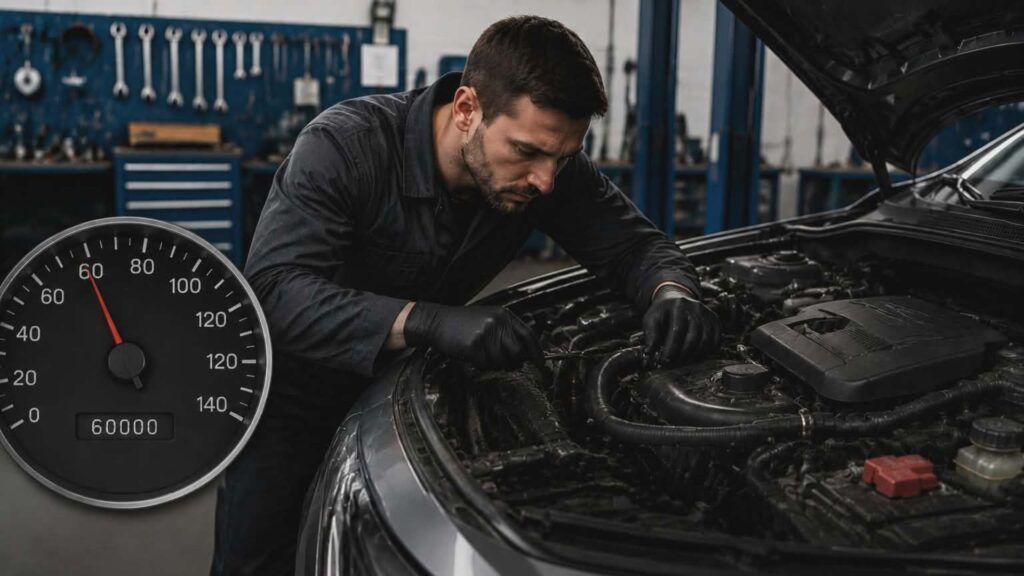
Car Maintenance By Mileage: A Smart Schedule To Keep Your Ride Reliable Most drivers know they’re supposed to take care of their car. But when it comes to the actual details – what to do, when to do it, and why it matters – things get fuzzy fast. That’s where a mileage-based maintenance approach makes life a whole lot simpler. Instead of guessing or waiting for something to go wrong, you follow a car maintenance schedule tied to your odometer. It takes the mystery out of ownership and keeps small problems from turning into expensive ones. Why Scheduling Car Maintenance By Mileage Makes Sense Time-based reminders have their place, but your car ages in miles, not months. A vehicle that sits in a garage and a vehicle that racks up highway miles every week have very different maintenance needs – even if they’re the same make, model, and year. Tracking maintenance by mileage gives you a consistent, logical framework. It reflects actual wear and tear on your engine, transmission, brakes, tires, and other components. And when you follow it consistently, you protect vehicle longevity and avoid costly breakdowns. The 30-60-90 Schedule Explained Many car manufacturers recommend what’s commonly called the 30-60-90 schedule. This group differentiates maintenance tasks around three major mileage milestones: 30,000 miles, 60,000 miles, and 90,000 miles. Think of each one as a service checkpoint that becomes more thorough as your car ages. Your owner’s manual is the best starting point for understanding what maintenance is recommended at each stage. But here’s a general breakdown of what to expect. Around 30,000 Miles This is your first major milestone. By now, several routine maintenance items are due for attention. Most services are recommended around this point to prevent early wear and keep your car running efficiently. Air filter: Dust, pollen, and debris clog the air filter over time, hurting fuel economy and engine performance. This is typically the time to replace it. Fuel filter: A clogged fuel filter restricts flow to the engine and can affect performance. Replacing it here keeps fuel delivery clean and consistent. Brake inspection: Even if your brake pads still have life left, a brake inspection at 30,000 miles helps catch any concerns before they become safety issues. Fluid levels: Check and top off power steering fluid, brake fluid, coolant, and windshield washer fluid. These are easy to overlook but critical for vehicle performance. Tire rotation: Rotate the tires to promote even wear across all four wheels. If you haven’t been keeping up with oil changes, now is a good time to get into a consistent rhythm. Depending on driving conditions and the type of motor oil your car uses, an oil change every 3,000 to 7,500 miles is generally appropriate. Around 60,000 Miles The 60,000-mile mark is a significant service milestone. Your car has been through a lot, and certain components are reaching the end of their standard lifespan or need a closer look. Brake pads: Brake pads typically need replacement somewhere between 30,000 and 70,000 miles. At 60,000, inspect them carefully. Worn pads reduce stopping power and can damage your disc brake rotors. Battery: Your vehicle’s battery typically lasts three to five years. If yours is original and approaching that range, have it tested. Spark plugs: Worn spark plugs cause rough idling, reduced fuel economy, and poor engine performance. Replacing spark plugs at or before this point is standard recommended maintenance. Transmission fluid: This is a big one. Dirty or degraded transmission fluid causes friction and heat inside the transmission, leading to costly damage over time. Changing it here protects your gears. Belts and hoses: Inspect the serpentine belt and other belts for cracking or fraying. A snapped belt can disable your engine, power steering, or air conditioning compressor without warning. Suspension check: Have your struts, shocks, and steering components inspected. A worn strut affects handling, tire wear, and ride comfort. This is also a good time to schedule a thorough inspection of your exhaust system and catalytic converter. Issues here can hurt fuel economy and lead to sensor failures down the road. Around 90,000 Miles Reaching 90,000 miles is worth celebrating – it means your car has been reasonably well cared for. But this milestone also calls for some of the most thorough maintenance recommended in a full service cycle. At this stage, many of the components replaced at 30,000 miles are due again – air filter, fuel filter, spark plugs, and transmission fluid, among them. A few additional items deserve attention: Timing belt: Not every vehicle has one, but if yours does, replacement is critical. A broken timing belt can cause catastrophic engine damage. Check with your technician to confirm whether your car uses a belt or a timing chain. Coolant flush: Old coolant breaks down and can cause corrosion inside your engine and radiator. A coolant system flush at this interval is maintenance that is crucial for long-term engine health. Power steering system: Inspect the power steering pump and lines for leaks or wear. Replace power steering fluid if it hasn’t been done recently. Brake fluid: Brake fluid absorbs moisture over time, which lowers its boiling point and reduces braking effectiveness. Flushing it here is good preventive maintenance. Axle and drive shaft inspection: Check for wear on the axle boots and drive shaft components. Snow, salt, and road grime accelerate damage to these parts. Don’t Overlook Driving Conditions A car maintenance schedule based on mileage milestones is a solid foundation, but your specific driving conditions matter too. Stop-and-go traffic, extreme weather, towing, and rough roads all put more stress on your vehicle than normal highway driving. If that sounds like your daily routine, you may need to adjust your maintenance intervals and service more frequently than the standard 30-60-90 schedule suggests. Keeping Track of Your Car Maintenance Checklist The easiest way to stay on top of routine car maintenance is to keep a simple log of every service performed and the number of miles on your odometer at the

Car Maintenance By Mileage: A Smart Schedule To Keep Your Ride Reliable Read More »

Schedule

Schedule Your Appointment Today

Your Automotive Repair & Maintenance Service Specialist

What Our Customers Say

Privacy Policy
Manage Consent Preferences
| Do Not Share My Information | Conditions of Use | Notice and Take Down Policy | Website Accessibility Policy
© 2026 The content on this website is owned by us and our licensors. Do not copy any content (including images) without our consent.